Home Blog Page 27

Hair Rebonding – Side Effects and Steps to Do It At Home

0

Tired of your hair’s texture and want to try something new? Why not try hair rebonding? Worried about its cost? Do it yourself at home!

Open any fashion magazine, watch a movie or simply walk into a fancy restaurant, and you’re guaranteed to spot at least a few women with straight, silky-smooth, frizz-free hair. 

What do they do? Live in a salon? The few times you tried straightening or ironing your hair, your strands popped back into its frizzy, slightly-uncontrollable state within a few hours, or days, at best.

Have your triedrebonding instead? It’s a hair straightening method that works on all hair types.Chemicals are used to break and then restructure the bonds that make your hair, thereby making it straight and smooth.

Rebonding takes time and is a meticulous process that has to be done in a certain way to get the best result and to not cause any damage. Does that mean visits to the parlour then?

No, not necessary. Hair rebonding at home is possible and done by countless women. If you follow these hair rebonding steps diligently, you can easily get the silky smooth hair that you desire.

Before you start, ensure you have:

  • A hair rebonding kit
  • Ceramic or titanium plated straightening iron
  • A mild shampoo like Pantene Pro V which helps strengthen your hair as well
  • A deep conditioner
  • Gloves and applicatorbrush
  • An old t-shirt and hair clips

10 Steps To Do Hair Rebonding at Home

Step 1: Wash your hair like usual and dry it with a blow-dryer on medium heat.

Step 2: Using a comb, separate your hair into various sections. Fasten the sections using hair clips.

Step 3: Apply the relaxant (or cream softener) from the kit on your hair. Don’t forget to wear gloves when you do this. It usually needs to stay for at least 30 minutes, but read the instructions on the rebonding kit beforehand.

Step 4: Steam hair for 10 to 30 minutes using a hair steamer. In case you don’t own a hair steamer, you can dip a towel in boiling water, squeeze out the hot water and wrap it around your hair. Remember to wear gloves when dip the towel in the water. Again, how long you keep the towel depends on the kit you’re using.

Step 5: Wash the relaxant out completely and blowdry your hair.

Step 6: Cover your hair with keratin lotion.

Step 7: Iron your hair with a flat iron until it is poker-straight.

Step 8: Once again, separate your hair into sections. Apply the neutraliser to each section and let it stay for 30 minutes.

Step 9: Wash your hair in cold water and dry it completely with a blow dryer.

Step 10: Iron out any kinks in your hair with the flat iron.

The best part of this treatment is that with such manageable hair, you can enjoy literally countless hairstyles for rebonded hair.

If you follow these steps and the aftercare properly, you are unlikely to suffer from any rebonding side effects that you might be worried about.


7 Ways In Which Beetroot Is Beneficial For Our Skin Health

0

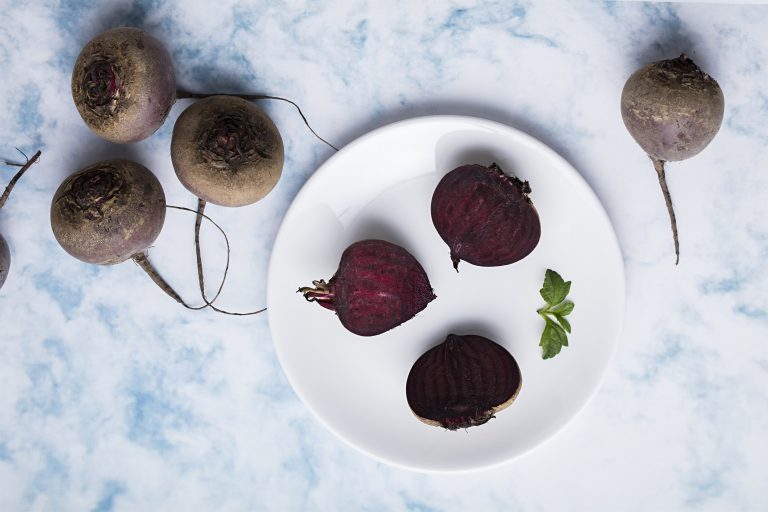
The simple beetrootholds within itself the magic of beauty and health. Its benefits for skin are to be tried to be believed. Will you?

The ordinary-looking beetroot is actually quite the extraordinary vegetable. It hides within itself numerous beauty and health secrets, and is a must-have in your beauty repertoire. Have it raw in a salad, or drink its juice, but make it part of your daily regimen to uncover a new you.

7 Benefits of Beetroot for Skin

#1 Beetroot juice fights acne and pimples


If you have oily skin and are prone to acne and pimples, then beetroot juice is your best friend. The vegetable has rich skin enhancing properties and drinking a glass of it regularly is immensely beneficial. If you can’t handle the taste of the beet, you can always add a little carrot or cucumber juice to your glass.


A paste of 2 tablespoons beetroot juice and mixed with one tablespoon of curds will dry up your acne and leave no scar behind either.

#2 Beetroot and glowing skin:


The benefits of beetroot juice for skin work from within and on the surface too. Drinking a glass of juice purifies blood and eliminates toxins, leaving you with healthy and glowing skin.


Applying the juice on your face regularly will slough off dead cells, making your skin soft and supple.

#3 Skin fairness


If you want to get lighter skin, but aren’t willing to subject yourself to the chemicals in creams, try beetroot for skin fairness instead. Mix equal parts of beetroot juice and lemon juice and apply it to your face before sleeping. Wash it off after 15 minutes and soon you will notice your skin getting fairer.

#4 Goodbye blemishes, dark spots and dark circles


Bid adieu to all dark spots and blemishes, and under-eye circles too with beetroot juice. Mix equal parts of beetroot juice with tomato juice and apply it on the spots and dark circles. In time you will notice the spots getting lighter. You can also drink a glass of juice daily to work from within.

#5 Naturally-soft, pink lips


Dab on some beetroot juice to your lips every night before sleeping. The juice will work its magic and very soon you will have soft, pink lips.

#6 Dry skin no more


Winter is approaching and bringing with itself dry skin issues. But no more. Make a beetroot face mask using the juice, honey and milk, and apply it all over dry skin.Say hello to soft and moisturised skin. If you don’t have time to make beetroot face pack, ensure that you moisturise your skin after you have a bath with Olay Total Effects 7 in One Day Cream which also has sun protection properties!

#7 Keep those wrinkles at bay


Drink a glass of beetroot juice daily to maintain the elasticity of your skin. This will delay the appearance of wrinkles and fine lines.

Check Out 5 Saffron Benefits For Skin & DIY Saffron Face Pack

0

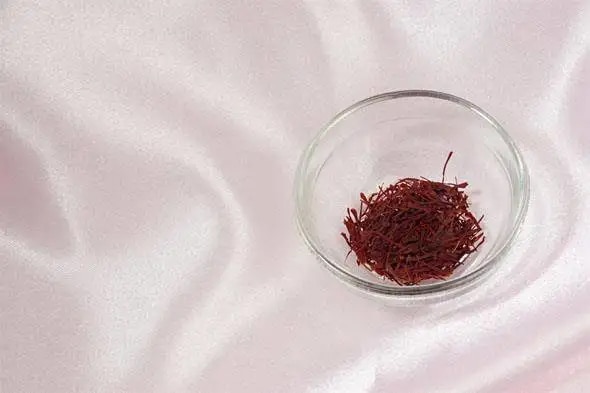
The exotic saffron is a beauty aid used by queens and princesses. This spice can be used to get beautiful skin that you’ll feel proud to flaunt.

Saffron or kesar is used in cooking, and has also earned a reputation as a beauty aid. It possesses therapeutic properties, and the potassium in it helps with cell formation and repair. Saffron benefits skin because it contains many vitamins and antioxidants that are beneficial to the skin. It is anti-inflammatory and soothes skin. It is antifungal and can be used to treat acne. If you use saffron for skin, make sure you purchase the highest quality of saffron. It should be deep red with orange tips and should take at least 15 minutes to change colors when soaked in water, and release a pleasant aroma. 

Saffron for face can be used by making a saffron face pack, face scrub and toner. Known to lighten skin, saffron is also used as an ingredient in many beauty products. But if saffron is unavailable to you, you can use Olay Natural White 7 In One Glowing Fairness Cream SPF 24 to get glowing skin easily.

1. Saffron Toner:

  • A saffron toner can be prepared by adding a few strands of saffron in rose water
  • Leave it in for at least 15 minutes before you apply the toner on cleansed skin to score skin that is toned and firm

2. How To Get Glowing Skin With Saffron:

  • For radiant skin, mix saffron strands with honey and massage into your skin
  • It will help with blood circulation, and it’ll lighten, hydrate and soften the skin leaving your skin with a fresh glow
  • Another face pack for luminous skin is a paste made with raw milk, saffron strands and sandalwood powder

3. Kesar Face Pack For Skin Lightening:

Saffron is well-known as a skin lightening agent.

  • You can make the most of this by mixing saffron strands with raw milk and lemon juice, and applying it on your skin for at least 15 minutes using circular motions
  • It will help you get rid of tan, and with weekly use, you may notice that your skin color will lighten
  • It is always a good idea to soak the saffron strands in milk for at least an hour before use
  • You could also add sunflower seeds to this mixture, soak overnight, grind and apply the paste in the morning

4. How To Use Saffron To Treat Blemishes:

  • Saffron can be soaked with a few basil leaves in water and then made into a paste
  • This paste needs to be massaged into your skin using circular motion
  • After leaving it on for up to 15 minutes, you can wash it off with cold water
  • While saffron is antifungal, basil leaves are known to be antibacterial.
  • They can work together to treat the acne
  • You could also add turmeric, which is antiseptic, to this mix

5. Saffron For Skin Brightening:

  • A great way to brighten dull skin is to soak saffron strands in water overnight
  • This solution can be added to virgin coconut oil or olive oil and a bit of raw milk
  • A bread piece can be used to scrub this mixture on your face. It is an effective way to exfoliate skin and improve blood circulation

6 Interesting Beauty Recipes For Almond Face Packs

0

A few simple hair products to tone down the shine on your crowning glory. Read these simple tips on how to treat & manage oily hair.

Almonds benefit your skin because of the nutrients they contain that include a range of vitamins, proteins and minerals. Badam face pack is an age-old beauty recipe, and women have always relied on almond powder for face and almond paste for face to revitalize their skin. Any almond face pack comes with the benefits of reducing the signs of ageing, lightening and nourishing. The beauty benefits of almond stands on strong ground; they are not restricted to homemade beauty recipes. Even products like Olay White Radiance Brightening Intensive Lotion Moisturiser help providing nourishment to your skin. If you haven’t already, it is time you tried out a few almond face packs. It does not matter what type of skin you have, as the recipe can be tweaked to suit your specific skin type.

Almond Face Pack for All Skin Types:

  • Crush almonds that have been soaked overnight.
  • Mix it with raw milk, and apply on the face and neck until it dries.
  • Wash off with cold water.
  • With regular use, your skin will be rid of uneven tone and will be velvet smooth. This is also beneficial for sensitive skin.                                               

Almond Face Pack for Oily Skin:         

  • If you have oily skin that is afflicted with acne, ground almonds that have been soaked overnight in water.
  • Mix this with yoghurt to make a paste that can be applied on your cleansed skin. This will help you get rid of pimples and replace the oiliness with a glow.
  • You can also mix the ground almonds with papaya. It will help lighten your skin.
  • Oily skin also benefits from multani mitti which reduces the greasiness. By mixing almond with multani mitti and rose water, you will have a winner.

Badam Face Pack for Dry Skin:

  • For women with dry skin, a face pack with crushed almonds, oatmeal and milk is ideal.
  • Again, you must soak the almonds overnight before crushing them. This paste will remove dead cells and moisturise your skin.
  • Using crushed almonds with mashed banana is also recommended for dry skin.

Almond Face Pack to Lighten Skin:

  • If you want to lighten your skin colour and brighten it, look no further than crushed almonds and lemon juice, which works well for tanned skin.
  • You can also make a paste with sandalwood powder, crushed almonds and milk.
  • To prepare an ubtan pack, mix besan, almond paste, and turmeric with milk, and apply.
  • After it dries, it can be washed off with warm water.
  • If you are battling pigmentation, try a paste with crushed almonds, almond oil, and milk. Click here to know more about besan face pack home remedies.

Almond Face Pack for Acne-Prone Skin:

To treat acne-prone skin, almond meal can be mixed with a pinch of cinnamon powder and honey. This will moisturise your skin while the cinnamon powder, which is antibacterial, contains the acne.

Badam Face Pack for Ageing Skin:

Wrinkles and other signs of ageing on the skin can be reduced by applying a pack with crushed almonds, olive oil and yoghurt.

Find a pack that suits your skin type and watch as the almonds work their magic on your skin!

7 Secret Tricks to Get Gorgeous Curls without Heat or a Curling Iron

0

Use these 7 tricks to get rid of poker, straight hair and be one of the trendiest fashionistas with those hot curls.

Tight curls, gentle and soft curls, wavy hair – curls are amazing. And the best part is that they flatter just about any type of hair, and on any length. But if you’re blessed with poker straight hair, (and we say blessed because straight hair looks amazing too, right?) then what do you do?

Hair curling is an option, but what about hair damage? Fortunately, there are several techniques that teach you how to curl hair without a curling iron or tongs. We’ve put down the fastest and the best ways for hair curling without heat.


Top Ways to Curl Your Hair Without Heat

#1: Old t-shirt for New Curls

  1. Wash your hair the way you usually do. Blot it dry with a towel.
  2. Cut a t-shirt in long strips from the neck to the hem.
  3. The thinner the strip, the tighter the curls.
  4. Take a small section of your hair, and roll the strip and the hair upwards till your scalp (or till as much as you want). Roll inwards so the curls turn towards your neck.
  5. Tie the end of the strip to hold the hair in place.
  6. Repeat this for all the hair.
  7. Let your hair dry completely before removing the strips.

#2: Headband for Retro Curls

  1. Wash your hair the way you usually do. Blot it dry with a towel.
  2. Slip a headband around your head.
  3. Take sections of your hair and wrap around the hairband until all the hair is within the band.
  4. Secure loose ends with pins.
  5. Let your hair dry completely.
  6. Gently remove the headband and pins, and unleash your curls.

#3: Braiding for Natural Waves

  1. Wash your hair the way you usually do. Blot it dry with a towel.
  2. Make a center parting and tie two ponytails.
  3. Braid the two ponytails and secure the end with a rubber band.
  4. For tight curls, make more braids, for looser curls, make just one braid.
  5. Let your hair dry completely.
  6. Gently loosen the braids and shake your curls free.

#4: Sock Bun Waves

  1. Take an old sock with the toe part cut out and roll it into a doughnut shape.
  2. Wash your hair the way you usually do. Blot it dry with a towel.
  3. Pull your hair into a ponytail at the top of your head.
  4. Pull your ponytail through the sock. Wrap the hair and tuck it in securely.
  5. Roll the sock to include more hair.
  6. Continue rolling and tucking until you reach the top of your head.
  7. Secure the bun with the help of clips.
  8. Sleep in with the bun and loosen it in the morning for gorgeous tumbling waves.

#5: Waves are Easy

  1. Wet your hair lightly unless you’ve just washed it.
  2. Detangle your hair and make a center parting.
  3. Twist each section tightly to form a bun on the two sides of your head.
  4. Let your hair dry overnight.
  5. Gently open the buns the next morning and voila! Waves!

#6: Roll with it

  1. Get your hands on some hair rollers. Big rollers give big curls, and small ones give tighter curls.
  2. Wash and condition your hair, and blot it with a towel.
  3. Separate a section, roll it and immediately encase it in a roller. Secure the roller as per instructions.
  4. Repeat the step until all hair is sheathed in rollers.
  5. Leave untouched for 4-5 hours.
  6. Gently remove the rollers and enjoy the curls.

#7: Twist & Curl

  1. Wash your hair the way you usually do. Then dry it with a soft towel.
  2. Comb your hair thoroughly and make a center parting.
  3. Twist each section until it resembles a tight coil. Secure it to the top of your head with a clip. Do the same to the other side.
  4. Allow your hair to dry overnight.
  5. Remove the clips and enjoy your curls.

You are thinking that the above methods can be used in curling long and medium hair lengths, right?

Well, if you are wondering how to curl short hair without a curler, then we can assure you that, the methods mentioned above are workable on short lengths of hair.

Rather the braiding and the headband roll methods are best for short hair, and will give you waves with an oomph!

Also, we have given such a detailed DIY for heatless curls, there definitely must be some benefits of this method of curling your hair. Well, the following points are the most important as per our perspective and hence we think you should try heatless curls.

What are the benefits of curling hair?

  • You get added volume in your hair with effortless curls and waves
  • You don’t have to style it a lot, as waves and curls settle and give you a fresh new look in accordance to the curl diameters
  • Reduced hair fall due to reduced styling and combing of hair
  • You can easily avoid ponytail ridges and hair pin marks due to curled hair

Now that you know the benefits of curling your hair, refer the below points for added benefits of heatless curls.

Disadvantages of using Curling Irons

  • Split ends – The heat emitted by the curling irons ends up giving us more split ends than usual
  • Hair Loss – Due to excessive heat, hair is weakened, and thus prone to increased hair loss
  • Loss of Shine – Over time, excessive heat leads to dull, lifeless hair
  • Brittle and Rough Hair – Over styling also leads to brittle and rough hair

Getting curls with no heat method eliminates all the above stated disadvantages and hence it is advisable to use our no heat hair curling methods the next time you feel like sporting curly or wavy hairstyle!

Onion For Hair – 10 Hair Health Benefits & Tips To Use It For Hair Growth

0

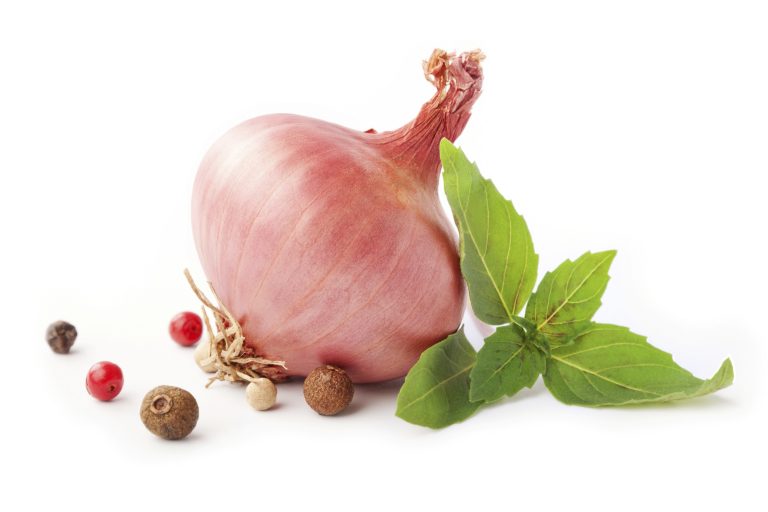
Onions are good for a lot more besides adding flavour to food.

10 Amazing Benefits of Onions for Hair

Rich in antibacterial and antifungal properties, the use of onion for hair truly helps keeps hair loss at bay. Here are 10 amazing ways your hair can benefit from using onions:

  1. They are very good at hair follicle nourishment and help restore lost nutrients to your scalp.
  2. They are rich in Sulphur, which is known to minimize breakage and thinning.
  3. They have potent anti-bacterial properties and help fight infections of the scalp. This in turn helps reduce hair fall as scalp infections can cause massive loss of hair.
  4. They are naturally potent antioxidants, which is why they help reverse the effects of premature greying.
  5. This vegetable lends a healthy shine to hair, which can become permanent when used regularly.
  6. Research has found that they have the ability to prevent neck and head cancer.
  7. They also make your hair uninhabitable for lice.
  8. Add volume by using onion juice for hair.
  9. They can be used to fight dandruff owing to their rich anti-bacterial properties.
  10. They improve blood circulation which is another way they contribute to hair growth.

Learn How to Make Onion Juice at Home

  • Peel the onions and cut them in 4 parts
  • Blend these pieces in a juicer/grinder
  • Add a little water and then filter the juice using a muslin cloth.
  • This will ensure that no onion chunks are stuck in your hair while you use the juice.

Learn How To Use Onion Juice for Hair Growth

  • Give your scalp a good application of onion juice
  • Using your fingers, gently massage it into your scalp using circular movements
  • Let it sit for approx. one hour
  • Rinse it off with a mild shampoo with a nice fragrance to get rid of the pungent smell of onions. Pantene Pro-V Silky Smooth Care shampoo and conditioner will cleanse your hair gently and also nourish it.
  • Do this often to witness the benefits. You can actually try this once a week for 2 months to see some visible difference.

You can also add the benefits of onions and some other ingredient to get stronger, glossier hair!

4 Homemade Onion Juice Hair Packs for Stronger, Healthier Hair

#1 Honey and Onion Juice Hair Pack For Hair Growth

  • Take quarter cup onion juice
  • Mix a tablespoon of honey in this juice
  • Apply this mixture on your scalp and hair roots
  • Wash it after 30 mins with a mild shampoo


#2 Olive Oil and Onion Juice Hair Massage for Hair Growth

Olive oil is a great oil for hair massages as it penetrates your scalp and nourishes it readily. Olive oil also has anti-dandruff properties and hence is an added bonus!

  • Take 3 tablespoons of onion juice
  • Add 1 and half tablespoons of olive oil in it
  • Massage this mixture in your scalp in circular motions
  • Wash this off with a mild shampoo after 2 hours
  • Do this regularly to get stronger, dandruff-free hair!


#3 Onion and Curry Leaves Hair Mask

Curry leaves is known for its many hair benefits. It helps strengthen hair, prevents greying and boosts hair health.

  • Blend fresh curry leaves in a paste
  • Add 2 tablespoons of onion juice in this curry paste
  • Apply this hair pack on your scalp
  • Wash it off with mild shampoo after an hour


#4 Yogurt and Onion Hair Pack for Stronger Hair

Yogurt helps fight hair fall and when added with onion juice, helps in the hair growth process.

  • Mix 2 tablespoons of yogurt and fresh onion juice in a bowl.
  • Apply this hair mask on your scalp
  • Wash this mixture off with a mild shampoo after an hour

Tips To Remember While Using Onion Juice:

  1. Always filter the juice made so as to avoid flaky onion particles in your hair. Removing these flakes from the hair is going to be a painful task. So better to filter the juice with a muslin cloth before applying it on the scalp.
  2. Always use mild shampoos to wash onion juice from your hair.
  3. You can garlic, apple cider vinegar to get added benefits of these ingredients
  4. If you can’t stand the pungent smell, you can add a few drops of any of your favorite essential oils in the juice.
  5. Always perform a patch test before using onion juice to prevent any allergic reactions

After getting so much information related to hair care while using onion juice, you must be wondering about some few basic questions. Read on to learn the answers to the most frequently asked questions:

#1 Can Onion Juice Be Left On Hair Overnight

This depends on the level of baldness experienced by the user. You can apply onion juice on hair in the night and wash it off in the evening, when it has a little diluted Sulphur content, as it can cause scalp irritation. Maybe you can add a little onion juice to castor oil and leave it on overnight, but we recommend the standard DIY methods which keeps onion juice on the hair, for not more than 30 minutes.

#2 How Often Should I Use Onion Juice For Hair Growth

You can start with once a week and gradually decrease the application, once you see visible changes (you should be able to see changes within 1.5 months). If you can’t see changes within 2-3 months, it could be an irreversible hair loss and you could visit a doctor for medical treatment of hair loss.

#3 How Long Does Onion Juice Last In the Fridge

It is recommended to use fresh onion juice on every application. However, if you wish to store it in the refrigerator, you can freeze the juice up to 5 days.

#4 Does Onion Juice for Hair Growth Have Any Side Effects

No it does not, however, we suggest a patch test before taking up this DIY for skin irritation testing.

#5 How to Remove the Smell of Onion from Your Hair

  • You can wash your hair with a citrus fruit based shampoo (preferably lemon) to get rid of the awful onion-y smell
  • You can also rinse your hair with infused water. To make infused water boil rosemary and mint leaves in a glass of water and use it as a last hair rinse after it cools down
  • You can also add a little lemon juice in onion juice to reduce the pungent smell of onions

Learn 5 Amazing Curd Face Packs To Pamper Your Skin A Little More

0

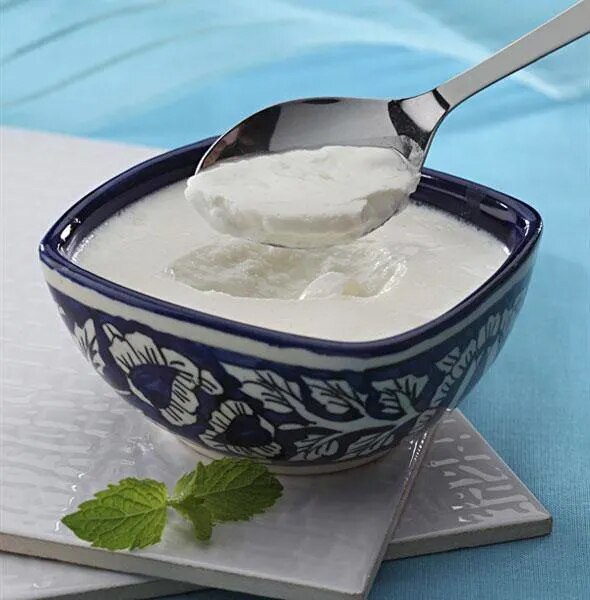
Every Indian household in the world swears on the wonder that is curd. It’s always there in our refrigerator and our meals are incomplete without it. It’s an excellent probiotic and helps keep our digestive systems clean. If you are tired of your skin problems, maybe it’s time for a little curd action!

Curd is full of good bacteria that helps your skin glow by nourishing it from within. Full of protein, calcium and vitamin D, curd for skin improves your complexion. Its anti-inflammatory properties aids in reducing acne. The antioxidants present in this superfood heals dry skin. The only side effect is gorgeous skin.

Not only can you use curd for oily skin, you can use a curd face pack to treat your dry skin too. Because of the lactic acid present in curd, it organically exfoliates and moisturises your skin at the same time. I told you, the thing is practically magic!

5 Different Ways To Use Curd (Dahi) For Face & Skin:

1.  Nurture Your Skin With Curd & Honey Face Pack:

Ingredients:

  • 1 teaspoon of honey
  • 2 teaspoons of rose water
  • 1 tablespoon of curd

Steps To Make:

  1. Mix into a smooth paste and apply to your face.
  2. Keep it on for 15 minutes and then wash your face with a mild face wash like Olay Total Effects Revitalizing Foaming Cleanser.
  3. Your skin will feel as soft as a baby’s bottom. 

2.  Destroy Those Pimples With Curd & Orange Peel Face Pack:


The best curd face pack for skin whitening has to be this one. 

Ingredients:

  • 2 teaspoons of orange peel powder
  • 1 tablespoon of honey
  • 1 tablespoon of ground masoor dal
  • 2 tablespoons of curd

Procedure:

  1. Mix it all together and apply to your face for 15 minutes.
  2. Repeat it once a week and see your acne diminish in no time.

3. Curd & Cucumber Face Pack After A Day Out In The Harsh Sun:


  1. Take 3 tablespoons of curd and if you can get your hands on some chamomile essential oil, nothing like it. If not, you can use the juice of 1 cucumber instead.
  2. Apply on your face and rest for 15 minutes.
  3. You can repeat this every day till your skin feels supple again. 

4. Curd & Turmeric Face Pack To Exfoliate and Moisturize Skin:


You don’t need to be a bride to do this. But I promise you’ll get the glow.

Ingredients:

  • 1 tablespoon of chickpea flour or besan
  • 2 tablespoons of curd
  • 1 teaspoon of turmeric

Procedure:

Keep it on for 15 minutes and wash it off with cool water. See that new found radiance? You’re welcome!

5. Say Bye To Wrinkles With Curd & Olive Oil Face Mask :


Curd for face is like an elixir of life. Its antioxidant properties help you fight those lines.

Ingredients:

  • 1 tablespoon of olive oil
  • 4 tablespoons of curd

Procedure:

  1. Mix it up and apply to your face for 15 minutes thrice a week.
  2. Notice your wrinkles disappearing and a youthful beam on your face.

Now that you’re familiar with the magical properties of curd, get started on your journey towards flawless skin. 

5 Effective Home Remedies To Stop Vomiting During Pregnancy

0

Pregnancy would be so wonderful, if not for the nausea and vomiting. Here are some simple tips and tricks that should help you beat the problem. And no, by that we don’t mean the father.

How can something as wonderful and miracle-y like pregnancy start with nausea and vomiting? But that’s just a woman’s body, resilient and filled with mysteries, and pregnancy nausea is one of those. Vomiting during pregnancy is perfectly normal, although tad unpleasant.

No one knows what the exact reason for vomiting during pregnancy is. Science would have us believe that the rapidly changing hormones in the body throw things out of gear a bit. Your stomach muscles are affected and the result is ‘morning sickness’. Click to read more on how to check for pregnancy at home.

Nearly 65% of pregnant women are affected by vomiting in pregnancy. The triggers could be certain smells, foods, stress, anxiousness, tiredness or even vitamin deficiencies. But if you keep in mind some of these tips and tricks you might be able to beat the problem or keep it down at least, literally.

5 Home Remedies To Stop Vomiting During Pregnancy:

#1 Lemon

The first in our list of home remedies for vomiting during pregnancy is the simple lemon. Its smell can calm you down and lessen nausea.

How To Use:


  • Start your day by drinking a glass of water with freshly-squeezed lemon and a spoonful of honey.
  • Or grate and take a whiff of fresh lemon peels to feel better when a wave of nausea hits you.
  • Or put a few drops of lemon essential oil into a handkerchief and inhale deeply whenever you feel nauseous.

#2 Have a cracker

Have a cracker first thing in the morning. The cracker is bland, rich in carbs and soaks up any acids accumulated through the night.

Directions To Use:


  • Keep the crackers handy and pop a few before getting up in the morning.
  • Don’t get up right away. Let the digestion process start.
  • Do not allow yourself to get hungry and eat the cracker before nausea hits you.

#3 Sip water

  • The easiest remedy for combating morning sickness is water.
  • Drink water as soon as you get up. Take a few sips before you get out of bed. Lie down while it settles.
  • Drink a glass of water every hour to stay hydrated and reduce the chance of nausea.

#4 Get more Vitamin B6

  • Vitamin B6 is known to fight nausea and is also safe for the foetus.
  • Take vitamin B6 supplements with the consultation of your gynaecologist.
  • If you prefer a natural source, add bananas, fish, avocados, brown rice, corn and nuts to your diet.

#5 Ginger

Ginger is the answer if you want to know how to avoid vomiting during pregnancy. It helps digestion and limits the secretion of stomach acids.

How To Use:


  • Pop a small piece of ginger in your mouth and suck on it when you feel nauseous.
  • Add 5 drops of ginger juice to 1 teaspoon of honey. Eat this first thing in the morning, letting it settle in before getting out of bed.
  • Drink 1-2 cups of ginger tea daily. Boil one teaspoon of grated ginger in a cup of water for at least 10 minutes. Strain the liquid, add honey and sip it slowly, preferably with your feet up.

Before you know it, the trimester will be over, you will be happily pregnant and very soon a bundle of naughtiness will be part of your life. Remember to keep a packet of Whisper – Ultra Soft handy for when the time to bleed starts again.

5 Effectual Home Remedies For Stomach Pain During Periods

0

Periods can be quite a pain in the neck as well as various other body parts. But with the right diet and lifestyle it can be easier to live with it 5 days a month, month on month. Here are a few ways to tackle stomach pain during periods.

We girls don’t have it easy. Don’t let the men fool you into thinking there is all the attention, reservation and chivalry for you to enjoy. I’ll happily give it all up if I could just get rid of period pain. Emotionally and physically draining, I can’t wait for my periods to get done with. But until they do, it is 4-5 days of irritation, mood swings and stomach pain during periods.

What Causes Stomach Pain During Periods?

The cramps are our body’s way of getting rid of all the prepping it did for a baby. If there was no fertilisation, the inner wall of the uterus needs to shed. The uterus does this by contracting. Since the muscles cannot do this on their own, the body releases hormones, the worst of which is ‘prostaglandins’. Prostaglandins means pain and discomfort, let’s just know and accept that.

Also, during this process, the uterus gets no blood supply, which causes the muscles to spasm even more.  And that is the reason for stomach pain during periods.

5 Home Remedies To Reduce Stomach Pain During Periods:

#1 Papaya

Let’s begin talking about home remedies for stomach pain during periods with the papaya. Do not get fooled by its simplicity.

  • The anti-inflammatory agent contains iron, carotene, calcium, and vitamins A and C that relieve muscle contractions.
  • Gorge on papaya a few days before your periods and continue during those red letter days for pain relief.

#2 Basil (tulsi)

Basil has religious significance, but do you also know the medicinal benefits of this plant during your periods? Tulsi leaves contain analgesic properties that relieve pain, without any side-effects.

Directions To Use:


  • In a cup of water add a few basil leaves.
  • Let the water boil for a bit to let the goodness of the leaves seep in.
  • Turn off the heat, cover the vessel and allow the water to cool.
  • Sip from this every few hours to lessen your stomach cramps.

#3 Ginger

Ginger is my favourite herb, and rightly so. It is yummy and it also helps lessen stomach pain in periods.

Steps To Use:


  • In a cup of water add some grated ginger.
  • Boil the water for 4-5 minutes.
  • Strain, add honey and squeeze some lemon juice.
  • Drink a cup of this tea 2-3 times a day during your periods.

#4 Carrot juice

Stomach pain during periods can also be because of irregular periods. Include carrots in your diet to help regulate your cycle.

How To Use:


  • Chomp on raw carrots before and during your periods.
  • You can also have a glass or two of carrot juice daily during your periods to feel better.

#5 Cinnamon

The wonderful smelling kitchen ingredient is your friend during your periods.

How To Use:


  • It is antispasmodic, anti-inflammatory and anticlotting.
  • Add ¼ teaspoon cinnamon powder to a cup of hot water.
  • Let it steep for a bit.
  • Add a spoonful of honey and sip.
  • Do this 2-3 times a day a few days before your periods to prevent cramps.

Try these remedies to stop stomach cramps from interfering with life. However, if the pain is persistent or stops you in your tracks every time, consult a doctor to rule out any medical issues. And remember to use Whisper Ultra Soft, to stay dry and comfortable during your periods.

Make 5 Face Packs for Oily Skin Using Natural Ingredients At Home

0

Naturally glowing faces signify healthy skin, but shiny, oily faces don’t. End your struggles with these homemade face packs for oily skin.

Oily skin means acne, pimples and permanently sticky skin. Ugh! What a terrible misfortune. Now while it isn’t possible to change the type of skin you’re born with, it is possible to fight the oil and keep your skin looking and feeling fresh. With a homemade face pack for oily skin.


There are many creams and lotions in the market, but those are, at the end of the day, laden with chemicals. Wouldn’t you rather fight the problem naturally than with some unknown products?

Here are our top 5 face packs for oily skin and acne. The face pack for oily skin not only helps fight the oiliness, but also reduces scars caused by acne.

Top 5 Face Packs for Oily Skin

#1 Besan and curd face pack


You will need:

  • Besan (chickpea flour)
  • Curd

Making the pack:

  • Make a paste using two spoons besan and sufficient curd.
  • Apply it to your face and let it dry.
  • Moisten it with a little water and using gentle, circular movements, rub it off your face.
  • Rinse it off with cool water.

#2 Multani mitti face pack


Multani mitti makes the best face pack for oily skin.

You will need:

  • Multani Mitti/ Fuller’s Earth
  • Rose water
  • Lemon juice

Making the pack:

  • Mix all the ingredients to form a paste.
  • Apply the pack all over your face except around your eyes and lips.
  • Wash it off after 15 minutes or when it feels semi-dry. 

#3 Mint face pack for acne


Mint leaves (pudina leaves) are a good ingredient to make a natural face pack for oily skin.

You will need:

  • A sprig of mint leaves
  • Honey

Making the pack:

  • Grind the mint leaves.
  • Mix in enough honey to make a paste.
  • Apply this pack to your face and wait until it dries.
  • Wash off with cool water.

#4 Lemon juice and honey face mask


Lemon juice, being acidic in nature, bleaches your skin, and helps get rid of scars and tan.

You will need:

  • Lemon juice
  • Rose water, if needed
  • Honey

Making the pack:

  • Apply undiluted lemon juice on your clean face. It might tingle a little, but don’t wash it off as it is just doing its job.
  • If your skin is very sensitive, only then dilute the lemon juice with rose water to lessen its power.
  • Wait for 15 minutes and then apply honey.
  • Let the honey sit on your face for as long as you want it to.

#5 Cucumber face mask


Cucumber works by reducing the inflammation caused by pimples.

You will need:

  • Cucumber pulp and juice
  • Curd (optional)

Making the pack:

  • Grate the cucumber and separate the juice from the pulp.
  • Refrigerate the juice and the pulp.
  • Dip the chilled pulp in the juice and apply it to the spots on your face, one at a time.
  • Dip the pulp in the cold juice again if it starts to get warm.
  • You can also add two spoons of curd to the pulp.
  • Apply the mixture to your face.
  • Wash it off after 25-30 minutes.

Remember, you must:

  • Apply the pack on a recently washed clean face.
  • Moisturise after you wash the pack off. Olay Regenerist Advanced Anti-aging Revitalizing Hydration Cream is a good choice as it hydrates your skin with a rich non-greasy feel.
  • Say goodbye to oily skin with these simple homemade face packs.