Home Blog Page 28

Everything’s Fair With These 3 Fairness Face Packs

0

Bright, glowing skin is an attractive feature. And yet, many of us don’t know how to get there easily. We make it easy with these 3 tips.

Dull, tired-looking and discoloured skin is a bane in today’s ‘rush here, rush there’ life. There is literally no time to pamper and look after the skin regularly. And off-the-shelf products promise a lot, but you never know how your skin will react to them. You want to know how to get fairer skin, but without any side effects. 

Help is at hand, in your own house. No, we don’t just mean picking up a bottle of Olay, although it has been known to help many women, across countries. Did you know your kitchen is stocked with ingredients that can show you how to get fair skin naturally? 

Learn How To Make Fairness Face Packs at Home 

#1: Besan with lemon juice or curd

Also known as gram flour, besan is found in every home. Besides being a key ingredient in yummy snacks, it has medicinal properties that can fight skin problems. 

When mixed with lemon juice or curds, besan reduces skin blemishes, brightens skin and smoothens the complexion. 

Steps to make besan and lemon fairness face pack:

  1. Make a paste of ½ teaspoon besan, 4 ground almonds, ½ teaspoon milk and ½ teaspoon fresh lemon juice.
  2. Apply this on your face and leave it on for half an hour.
  3. Wash off with lukewarm water and pat dry. 

The combined effect of besan and lemon cleanses and brightens skin, while almonds and milk nourish it. The skin cleansing properties of besan are so popular that several spas use it in their beauty treatments.

#2: Milk and honey

Milk and honey when combined can work miracles. Both these natural products are gentle on the skin, nourishing and hydrating it. Honey goes a step further, using its anti-bacterial properties to fight secondary infections that cause blemishes and discolouration. 

Steps to make milk and honey fairness face pack:

  1. Mix a teaspoonful each of milk and honey
  2. Apply the mixture on your face. Massage it slowly using circular movements.
  3. Let the application stay on for at least 20 minutes to allow your skin to absorb all the benefits.
  4. Wash off with lukewarm water and pat dry.

Do this at least once a week (if not more) to see a change in your complexion.

#3: Papaya and lemon juice

Lemon juice seems to be quite the favourite if you want to know how to get fair complexion. 

When mixed with papaya, the result is staggering. Both, papaya and lemon have bleaching properties and you can be sure to get brighter-looking skin with this face pack. 

If you suffer from dry skin, you can add a little milk to the mix for hydration, as lemon tends to dry out the skin. 

Steps to make papaya and lemon juice fairness face pack:


  1. Mash a slice of a papaya, add 1 teaspoon each of lemon juice and milk
  2. Apply the blend to your face.
  3. Wash it off after 20 minutes to see an immediate brightening. 

Before you use any of these face packs, do remember, that even though they contain natural ingredients, you might still be allergic to them. It is always good to test the pack on a small area of your skin and wait for 24 hours to find out.
5 Amazing Homemade Sandalwood Face Packs Every Woman Must Try

0

Sandalwood has been a secret beauty ingredient for its healing and nourishing properties. Learn how to use it in your beauty routine.

The smell of sandalwood brings back fond memories from childhood, when the fragrance would linger around the house. Whether in the agarbatti or in the face packs that our grandmothers and aunts used, the smell immediately evokes a pleasant mood.

And this is just one of the many sandalwood benefits. What other uses of sandalwood powder for skin do you know?

This nature’s bounty has soothing and cooling properties that make it the perfect ingredient for beauty products. From daily skin care, to fighting skin blemishes, healing rashes, delaying wrinkles and lines, and reducing dullness and tans, the advantages of sandalwood for skin are tremendous.

8 Benefits of Sandalwood Powder for Skin:

#1 Anti-Ageing Properties

Sandalwood is rich in antioxidants and help in prevention of wrinkle formation, as it fights the damage that is caused by free radicals. Hence sandalwood has been used as an anti-ageing remedy since time immemorial.

#2 Natural Skin Whitening With Sandalwood

Sandalwood contains natural skin lightening agents and hence is used in many fairness face packs.

  • Take 1 tablespoon of sandalwood powder, and besan.
  • Add a little turmeric and put required amount of rose water to make a thin paste.
  • Apply this paste on your face for 15 minutes and wash it off with a mild face cleanser.

#3 Chandan Works Well To Cure Acne & Pimples

Chandan has a soothing and calming effect on the inflammation of skin caused due to pimples and acne. Our grannies have been using sandalwood for pimples and acne for centuries, and really leave the skin to be blemish-free.

  • Make a paste out of sandalwood, turmeric, a little camphor and milk
  • Apply this paste on the affected areas
  • Leave it on for the night and wash it off the next morning with water. Don’t use soap, as it could agitate the skin

#4 Sandalwood Powder for Acne Scars

Chandan has been used as a healing ingredient since ancient history as it is believed to have been a miracle ingredient that helps resolve even bruising and scars!

  • Take sandalwood powder and black gram powder (kaala channa)
  • Add a little rose water and use this paste regularly to ensure this is not repeated.

#5 Sun Tan Removal with Sandalwood

Sandalwood also helps in getting rid of sun tan. It is a simple DIY that gives you your original skin tone back!

  • Take a tablespoon of sandalwood powder, orange peel powder and yogurt
  • Mix all the ingredients in a bowl and apply the paste on tanned body parts
  • Wash it off with water after it dries out. Read more tan removal home remedies at our blog.

#6 Even Tone Skin with Chandan Paste

For Patchy, uneven skin tone, sandalwood is a blessing!

  • You need sandalwood powder, vitamin E capsules and lemon juice
  • Mix these ingredients into a thick paste
  • Apply it on the face till it dries and then wash it off with water

#7 Glowing, Blemish Free Skin

  • This is the easiest of the lot, as chandan has inherent skin brightening properties. You just need rose water and sandalwood powder.
  • Make a paste and apply it on your face, neck and hands
  • Wash it off once it dries

#8 Prickly Heat Cure

As stated earlier, sandalwood has soothing properties and hence, helps in prickly heat cure.

  • Take dried coriander leaves, sandalwood powder and rose water
  • Mix these ingredients to form a paste
  • Apply it on the heat boils and wash it off later!

Wait, before you head out to purchase a sandalwood beauty product off the shelf, why don’t you consider making your own beauty pack?

When combined with some everyday ingredients that are found in your kitchen, you can use sandalwood for face packs and get brighter, naturally glowing skin.

Learn How to Make Sandalwood Powder at Home

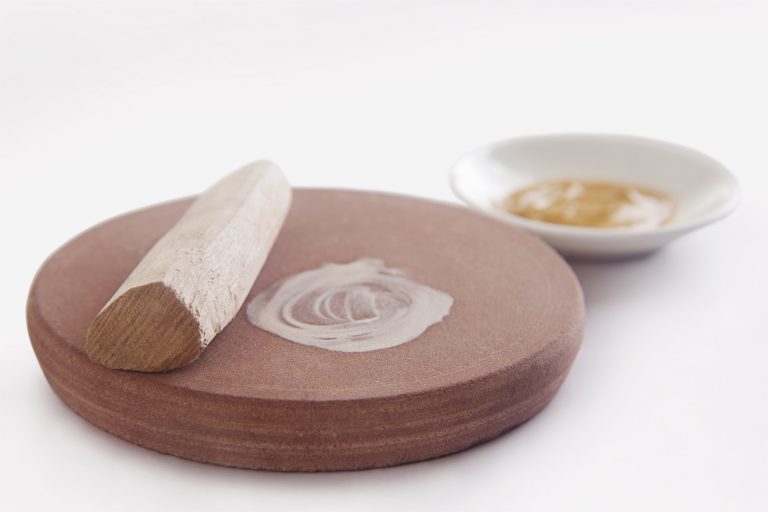
  • Take a plain marble stone
  • Add a few drops of water on this stone
  • Keep rubbing the sandalwood on this stone
  • You will get sandalwood paste
  • Dry this sandalwood paste to get pure, fine sandalwood powder

5 Popular Ways to Use Chandan (Sandalwood) for Gorgeous Skin

#1 Sandalwood and milk

A quick face pack for brightness, this hardly takes any time at all.

Steps to make this pack:

  • Make a paste by adding 1 teaspoon of sandalwood powder to just enough milk.
  • Mix well so there are no lumps.
  • Apply the paste on your face.
  • Leave it on for 10-15 minutes.
  • Wash off with cool water and pat dry.

#2 Sandalwood and honey

Both, sandalwood and honey are known to possess healing and nourishing properties. When you combine the two you get a power pack for instant skin uplift.

Steps to make this pack:

  • Make a paste with 1 teaspoon sandalwood powder and 1 teaspoon honey.
  • Cover your entire face with this paste.
  • Let it sit for 15-20 minutes.
  • Wash it off with cool water and see an almost immediate glow.
  • Use this pack in this season as honey is excellent on dry winter skin patches.

#3 Sandalwood and orange peel powder

Orange peel contains astringent properties that make it perfect for oily skin.

Steps to make this pack:

  • Mix 1 teaspoon sandalwood powder, 1 teaspoon orange peel powder and rose water.
  • Make a paste and apply it to your face.
  • Let it stay for 15-20 minutes before rinsing it off with cool water.

#4 Apple and sandalwood

An apple is just as good for your health as it is for your skin. Banish dullness with this homemade face pack.

Steps to make this pack:

  • Mash some apple into a pulp and add 1 teaspoon sandalwood powder.
  • Mix it well and apply the paste on your face.
  • After 15-20 minutes, when it has dried, wash it off thoroughly to reveal fresh glowing skin.

#5 Sandalwood and Curd

Give your skin the double nourishing power of curds and sandalwood.

Steps to make this pack:

  • Make a paste using 2-3 spoons fresh yogurt and 1 spoon sandalwood powder.
  • Apply this paste to your face.
  • Leave it on for 15-20 minutes and then rinse it off to reveal beautiful, glowing skin.

These are our favorite five quick and easy sandalwood face packs that you can make and use any day of the week, and get the glow back on your face. Also, we also recommend using a mild face wash to keep your face fresh all day long! Olay Moisture-balance Foaming Face Wash with Vitamin E is one of our current favorites, as it gently cleans the face and retains the natural moisture of the skin.

While you did just learn about sandalwood and the various beauty benefits, we think, it is about time you also learn about the different types of sandalwood powders that exist – red (rakhta chandan) and white (chandan). So far, you have learnt about the white sandalwood powder, now we will tell you about using red sandalwood powder in your beauty regime.

How to Use Red Sandalwood Powder for Face?

Get fresh, glowing skin with red sandalwood and papaya face pack

  • Take red sandalwood powder and add ripe papaya to it
  • Apply it as an exfoliating face mask
  • See visible changes post application of this face mask!

15 Different Ways To Use Ghee For Skin, Hair & Health

0

Remember when your mothers and grandmothers fed you spoonfuls of ghee during childhood? Read further to trace its benefits for adults.

Ghee is one of the healthiest forms of fat that you can pamper your body with. This tasty substance has been part of our lives, culture, food and memories since forever. Did you know that ghee goes beyond cuisine and the benefits of ghee extend to your skin and hair too?


Read on to know all that ghee can do for your skin and hair:

7 Incredible Benefits Of Ghee For Skin:

#1 Moisturises your face


Pamper the thin and delicate skin of your face with ghee.

How To Use:

  • Make a solution with equal parts of ghee and water and massage your face with it.
  • Let it sit for 15 minutes and then wash it off with cold water for soft and smooth skin.

#2 Hydrates dry skin


The fatty acids in ghee encourage deep hydration and make even the driest of skin soft and supple.

  • Warm up half a bowl of ghee and massage your entire body with it for 3-5 minutes before your bath. It is the perfect antidote for dry winters.

#3 Brightens skin


Eating ghee is good, yes. But it also brightens your skin.

Steps:

  • Make a mask using raw milk, besan (gram flour) and equal amount of ghee.
  • Apply the paste to your face and wash off after 15-20 minutes for skin that looks and feels gorgeous.

#4 Slows down skin aging


Another benefit of ghee for skin is that it helps defy time. Massage it into your skin daily and beat ageing by many years.

#5 Cures chapped lips


A drop of ghee when rubbed onto dry, chapped lips will lock in moisture. Leave it overnight and wake up to soft, kiss-worthy lips the next morning.

#6 Lightens dark lips


If your lips suffer from pigmentation, just massage your pout with ghee and within a few weeks you will get your pretty pink lips again.

#7 Brightens up eyes


Dull, tired eyes? No more. Just apply a little ghee under your eyes regularly and get bright, fresh and relaxed eyes within a few days.


Ghee also helps clear up dark circles. Smear it on your upper eyelids and under your eyes to get rid of that raccoon look.


Have you also tried Olay Regenerist Revitalising Eye Serum to fight the fine lines that appear around your eyes?

3 Miraculous Benefits Of Ghee For Hair Health

#1 Fights split ends


Massage ghee into dry and coarse hair to take care of split ends.

  • Warm up a little ghee and apply it to the ends of your locks.
  • Wash off with a mild shampoo like Pantene Pro-V Lively Clean shampoo after an hour.

#2 Deeply conditions hair


You can use ghee for hair, and turn dry and frizzy hair into soft, shiny and manageable tresses.

  • Mix equal parts of ghee with olive oil and massage deeply into your hair for 15-20 minutes.
  • Rinse it off with a good shampoo.

#3 Stimulates hair growth


People have been using ghee for hair growth, and you can get the same benefit too.

  • Just massage your scalp with warm ghee mixed with equal parts coconut oil.
  • The blend nourishes your scalp and encourages hair growth.

5 Ghee Benefits For Health That You Must Know:

#1 Has Low Fat Content:

Ghee is made of saturated fat and a good source of healthy fats. It is easier to digest, much healthier than butter and surely your go-to option in case you are having cholesterol problems.

#2 Boosts Your Immunity System:

Ghee is loaded with antioxidants which helps in increasing body’s ability to absorb vitamins and minerals from other foods that you consume in a day which in turn helps in keeping your immune system strong. Also, all those vitamins and minerals that are fat soluble helps in boosting our immunity and ghee helps in absorption of these nutrients

#3 Improves Eyesight:

As per Ayurveda, eating ghee regularly helps in improving eyesight. Even if you have irritation in eye, you can put in a drop or two of ghee for instant relief.

Caution: Do not put in warm ghee in your eye as it can cause contamination and damage your eyesight.

#4 Aids In Treatment Of Burns:

Ghee is widely used not only for treatment of burns but also to treat swelling in different parts of body. Also, it helps in reducing inflammation on skin. All you have to do is apply it in affected areas.

#5 Cough Relief:

This is an old & effective remedy which our grandma always keep telling us. For cough relief, you can either eat a teaspoon of ghee directly or make a paste of tulsi or holy basil and warmed ghee. Swallow it for instant relief.

Incredible, isn’t it, how something so simple and everyday is actually loaded with immense benefits? Start using ghee regularly to enhance the natural beauty of your skin and hair.

Who Says You Can’t Remove Blackheads Fast and Naturally!

0

Are blackheads dulling your inner glow? Do you find your skin still looking uneven no matter how much make up you slap on? It’s time you showed blackheads who’s the boss!

If you have oily skin, you know exactly what we’re talking about. Blackheads are those ugly brown spots that dot your face. They are mood and make-up spoilers that refuse to budge no matter how hard you try.

What causes blackheads?

The skin produces sebum, a natural oil which keeps it soft and moist. Butwhen dirt, grime, dead skin cells and other pollutants accumulate around open pores, it plugs them and traps sebum inside. This plug is a blackhead and starts as a brown coloured dot. The trapped sebum gets oxidised, turning the brown dot into black.If not attended to immediately, blackheads could turn into pus-filled pimples.

Blackheads usually occur on the face – in the nose area and the cheeks. This interferes with the skin’s even tone, giving it a patchy appearance.

Blackheads are stubborn, but so are you

If you were granted one wish, it would be how to get rid of blackheads fast, right?

Wish granted.

These 6 home remedies will not only show you how to clear blackheads, but also help prevent future occurrences.

1. Baking Soda 

Its antibacterial, antifungal, antiseptic and anti-inflammatory properties put baking soda at the top of the list to rid skin impurities.

Procedure:

  1. Apply a thick paste of 2-3 teaspoons of baking soda and 1 teaspoon of water on the blackheads, gently massaging for 3-4 minutes.
  2. Rinse off once dry after a few minutes.
  3. Repeat twice a week till skin is clear.

2. Cinnamon for Blackhead Removal

From weight loss to skincare, cinnamon has invaluable health benefits.

Procedure:

  1. Apply a thick paste of 1-2 teaspoonseach of honey and cinnamon powder before going to bed and leave overnight.
  2. Wash with normal water next morning.
  3. Continue this treatment for 10 days for best results.

3. Oatmeal Blackhead Removal Facepack

Oatmeal is a super breakfast food and works equally well on your skin when combined with other ingredients. Its exfoliating and cleansing properties are just what you need to keep blackheads away.

Procedure:

  1. Add 1-2 teaspoons honey to half cup of tomato juice and 1-2 tablespoons of oatmeal and mix well.
  2. Scrub your face with it and wash after 10 minutes.
  3. Repeat regularly for 10 days to see skin clear up.

4. Use Orange Peel to Remove Blackheads

Oranges are full of vitamin C and other nutrients which protect all skin types.

  1. Dry some orange peels in the sun and powder them in a mixer.
  2. To 2 teaspoons powder, add 3 tablespoons of rosewater and mix till a smooth paste.
  3. Apply the paste evenly on the affected parts and leave to dry.
  4. Once it dries, gently scrub it off using wet hands, then rinse your face with cold water.
  5. If you experience any irritation, rub an ice cube.

5. Clear Blackheads with Green Tea

One of nature’s best exfoliators for blackheads treatment is green tea. Its rich source of antioxidants makes it an effective skincare ingredient.

Procedure:

  1. Gently scrub a paste of 1 teaspoon of green tea leaves mixed with purified water for 5-6 minutes.
  2. This will deep cleans the oily skin and unclog the pores.
  3. Wash & clean with lukewarm water.

6. Turmeric

If used regularly, turmeric prevents pore clogging which allows the skin to breathe.

Turmeric works well for minor burns and is also quite commonly used to treat blackheads. Regular application of turmeric paste prevents clogging of pores which lets skin breathe.

Procedure:

  1. Mix 1 teaspoon of turmeric powder with 2 tablespoons of neem or mint juice and apply on affected area.
  2. After 10 minutes, once it has dried completely, wash off with lukewarm water.

10 Natural and Easy Tips for a Darker Mehndi Colour

0

Double your joys during festivals with these easy steps to darken the color of henna.

Somebody had said that the bride’s mehendi colour is a direct reflection of her husband’s love for her. But let’s not make your husband or boyfriend be tested by fire.

Actual Significance of Mehndi in Indian Culture:

Well, yes, it is said that Mehndi is a symbol of fertility and hence is used in wedding ceremonies. However, there is another significant reason as to why Mehndi has been used in our Indian weddings since centuries!

Mehndi is a medicinal herb, and is great in destressing a person. While wedding is a happy occasion for the families involved, it can get a little hectic. Mehndi application helps in calming the nerves and also, prevents headaches and fever.

It is also usually mixed with eucalyptus oil and lemon, which help in darkening the colour of the henna, but, are again great medicinal powerhouses!

Its application has been known since ancient times and hence it is always an integral part of most Indian festivals! 

But as mentioned earlier, the dark colour also represents the love your new family would have for you. We obviously don’t the truth of this matter, and this is just an age old belief, and hence the struggle to get really deep colour! However, lets not make them jump hoops for us, instead lets try to get deep dark clour of henna naturally. There are simple ways to make your mehndi colour deeper and darker.

10 Tips for Darker Mehndi Colour

#1 Washing before applying

Wash your palms thoroughly with soap before you sit down to apply mehndi. Make sure you don’t apply any creams or lotions. By eliminating any possible layers on your skin, mehendi will be completely absorbed and you will naturally get a darker shade.

#2 Apply eucalyptus oil

Make an exception with eucalyptus oil. After washing your hands apply this essential oil to your hands and feet. Not only does it smell good, but the oil actually helps darken the colour of mehendi.

#3 Let your mehendi dry naturally

Allow the mehendi on your hands to dry naturally. Don’t shake your hands or use a blow dryer. The movement or the blowing air can smudge the design and waste all the time you spent in getting it applied.

#4 Invest the hours

Keep the mehendi on your palms as long as you can, preferably overnight, if possible. Once it’s dried, you can ask someone to gently bandage your hands so the mehendi stays on and doesn’t leave crumbs in bed.

#5 Smoke it

It is believed that the smoke from heated cloves helps darken mehendi. Place some cloves in an iron pan and turn on the heat. Let the smoke coming from the cloves come in contact with your mehendi. Hold your hands out for as long as you can bear the heat and stop only when they start to hurt a bit.

#6 Lemon and sugar

Apply a mixture of sugar and lemon juice to your hands after your mehendi has dried completely. Dab it on gently using a cotton ball. Don’t go overboard with it as the juice might end up lightening the colour.

#7 Vicks to the rescue

After you’ve kept the mehendi overnight it’s time to remove it. Gently rub your hands together until all the mehendi has been scrapped off. Apply Vicks or some pickle oil to your hands. This has been known to give you a dark mehendi shade.

#8 Stay away from water

Ideally, allow 24 hours to lapse before you expose your mehendi to water. Water will wash away the top layer of the mehendi and not allow the colour to really penetrate deep within your skin.

#9 No beauty treatments

Keep all waxing, pedicure and manicure appointments before the mehendi. If you must do it later, allow at least 2-3 days to go by. Else you will end up scraping the top layer of the mehendi away and not get the desired result. Or else, if you really need to get rid of your body hair, you can shave your hair using Gillette Venus razors that are specially designed for women! But this is in a case of extreme necessity.

#10 Apply well in advance

Make sure there’s a gap of 1 or 2 days between applying the mehendi and your function. Mehendi usually gives its darkest shade after a few days. Plan your mehendi session accordingly and you will have the best colour possible.

These 10 simple mehendi tips will get your man off the hook and let you take complete ownership of your own mehendi colour.

Some Frequently Asked Questions Regarding Mehndi Application:

How long should I keep mehndi on hands?

You need to keep it at least till it dries; however, this will give you a light orange shade of mehendi. For darker colour, you need to keep it at least for 8 hours and if possible, even overnight, so that the colour is absorbed and you get a deep brown colour.

Oops! I have washed my hands! How to darken mehndi after washing now?

Well, as suggested earlier, there isn’t much you can do after washing away the top layer of henna. But you can try and combine all the methods suggested above to get a deeper colour. Yes, try putting eucalyptus oil or Vicks for 3-4 hours (can be put overnight as well, but ensure it is well bandages, so that it doesn’t irritate you).

Then in the morning you can try and roast cloves in a pan, and put your hands over the pan, so that the cloves smoke tries and strengthen the colour of your mehndi. Please be careful, and don’t keep your hands very close to the hot pan.

Does lemon and sugar really work in darkening the colour of henna?

Yes, it does! You need to apply this concoction when the henna paste is completely dry. Once you apply this sticky solution on the mehndi, the sugar will help in sticking of lemon juice, which in turn will darken the colour. You can do this, only when the henna paste is there on the hands!

How can I remove Mehendi from hand?

Post wedding, if you really don’t like the faint stains that mehndi leaves mehndi, you can use lemon juice to remove the stain colour. Lemon juice is a bleaching agent, and can help in lightening the colour. However, lemons are harsh on the skin, and hence it is advisable to moisturize post this!

8 Benefits of Almond Oil for Skin & its 7 Uses to Solve Common Skin Problems

0

While almonds are great for your eyes, almond oil is fabulous for your skin.


Long before science identified the myriad almond oil benefits it was already being used by our ancestors as a beauty aid. Here is why and how almond oil for skin works wonders:

8 Reasons Why Almond Oil Is Good For Your Skin

#1 Promotes Flawless Skin

Almond oil is mild and has hypoallergenic properties which makes it great for sensitive skin too.

  • It is best applied when it is at the same temperature as your body.
  • Another reason almond oil is so good for skin is because it is rich in Vitamin E which is a very effective anti-oxidant.
  • Apply the oil regularly and your skin will combat stress and UV damage with ease.

#2 Deep Cleanses Skin & Prevents Acne

One of the best characteristics of almond oil is that it is very light texturally.

  • This makes it easy for the body to absorb it as well as for the oil to penetrate skin deeply and get rid of accumulated debris.
  • This in turn prevents the formation of acne.
  • What’s more, almond oil is rich in Vitamin A which is known to reduce acne flare-ups.

#3 Almond Oil for Dark Circles

  • Almond oil is a miracle cure for dark circles and eye bags.
  • Simply apply some below your eyes every night before sleeping and in 2 weeks you will see the difference.

#4 Almond Oil also Removes Tan

  • To get rid of tan, simply mix a couple of drops of almond oil and an equal quantity of lemon juice in a tsp. of honey
  • Apply this mixture on tan affected area and see a visible difference after a few applications

#5 Relieves Psoriasis and Eczema

If you suffer from any of the abovementioned skin conditions it is essential that you keep your skin hydrated and moisturized. Almond oil, which is hypoallergenic, does exactly that.

#6 Treats Skin Rashes

Almond oil is natural and more effective treatment for skin rashes than any of the zinc based creams that doctors otherwise prescribe. This is because it is rich in zinc content and it also has no side-effects whatsoever.

#7 Reduces Signs of Ageing

Ageing is natural but premature ageing isn’t.

  • With the aid of almond oil you can reverse the effects of skin ageing caused by exposure to factors like the sun, smoke as well as from dehydration.
  • Additionally, using a nourishing product like Olay Regenerist Regenerating Day Cream with SPF 15 will make your skin look radiant and youthful.

Anti-ageing Recipe Using Almond Oil

  1. Using water that is lukewarm, gently cleanse your face to remove makeup and/or dirt
  2. After heating a tsp. of almond oil, mix in about two drops of Vitamin E extracted from a capsule.
  3. Now apply the resulting mixture on your face, gently massaging it in using your fingers.
  4. After about 10 minutes, use a wet towel to take it off
  5. Rinse you face with lukewarm water and then pat it dry

#8 Healing Properties of Almond Oil       

A bruise is formed when the blood vessel bursts under your skin due to some injury. This blood clot takes anything from 3-5 days to completely heal. However, almond has healing properties, which help with bruising.

Mix geranium oil with almond oil and apply it on the bruise for effective healing. Do not use geranium oil without diluting it with almond oil!

Almond Oil can be used for many other skin related problems. Check out our favorite home remedies that solve many of our beauty problems with just 1 ingredient – almond oil!

7 Almond Oil Remedies for Common Skin Problems

#1 Almond Oil for Skin Whitening & Fairness:

  • Warm a few teaspoons of almond oil
  • Ensure that the oil is not heated directly
  • Massage this warm almond oil on your face for 10-15 minutes
  • Do this regularly and notice rejuvenated skin after a few weeks due to increased blood circulation

#2 Almond Oil for Cracked Feet:

  • Almond oil is a light oil, which can deeply penetrate the skin and hence provide advance nourishment
  • Just apply almond oil over your cracked heels and leave it as it is for the entire night
  • Next morning wash it off with lukewarm water
  • This method also is helpful for fungal infections of your foot

#3 Almond Oil for Stretch Marks

  • Almond oil is rich in vitamin E that helps in reduction of stretch marks
  • Take a little almond oil, and massage on areas with stretch marks
  • Ensure that before this, you have exfoliated the area with a dry brush and are applying almond oil immediately after you take a shower
  • This way, stretch marks are reduced over time

#4 Sweet Almond Oil as a Natural Makeup Remover:

  • Sweet almond oil is very gentle on the skin, and is an amazing makeup remover
  • Take a few drops of almond oil on a cotton ball and wipe off the makeup
  • Almond oil will also nourish and soften your skin, while removing all traces of makeup from your face

 #5 Sweet Almond Oil for Your Lips

  • Almond oil is soothes and moisturizes your lips
  • It always lightens dark lips, removes dark spots and tries to even the lip colour
  • You can mix almond oil with honey and milk
  • Apply this lip balm mixture on your lips for 30 mins. You can also leave this mixture on your lips overnight.
  • Next morning wash it off with cold water
  • Repeat this daily for 2-3 months to see visible difference

#6 Almond Oil for Face Acne & Pimples

  • Take pure sweet almond oil and apply it on clean face before you go to sleep. Massage it on your face for a minute or two, so that it is soaked in.
  • The substances present in almond oil get rid of sebum, which clog pores, and eventually lead to acne and pimple.

#7 Almond Oil for Face Glow – Overnight Treatment!

  • Before you go to sleep, wash your hands clean and take a few drops of almond oil and warm it up by rubbing your palms together.
  • Use this warmed up oil to clean your face.
  • Post this wash your face with a mild face cleanser
  • Again take a few drops of sweet almond oil and pat it on your face and sleep
  • This will ensure a flawless, glowing skin always!

As much as we have written about almond oil, it is an easily adulterated commodity. Hence, if you have the time and patience, we definitely suggest making almond oil at home. This will give you the purest form of almond oil that will nourish your skin thoroughly.

How to Make Almond Oil at Home:

  • To make almond oil, you will need a handful of almonds, a blender and 2-3 tablespoons of olive oil
  • Take handful of almonds and start blending them in a mixer grinder at a slow speed.
  • Ensure that the almonds are completely dry and fresh and that the blending is taking place at the lowest speed
  • While blending the almonds, look out for buildup on the sides and keep removing it and mixing it again with the blended almond
  • Once the almond seems to be of smooth consistency, start blending it at a higher speed
  • Now add a teaspoon of olive oil. If it still is not blending properly, add another teaspoon of olive oil
  • Keep blending till you have a smooth paste of almond
  • Store this mixture in a glass jar for 2 weeks
  • During this period, the oil will separate from the solid particles
  • Now strain and use the almond oil!

Now learning about the endless goodness of almond oil, you sure must be burning up with questions like is it good for oily skinned people, can I put it on lips, as I would be consuming it in a little amount and also, you must have heard your mom talk about sweet almond oil a lot for skin care benefits. So, here we are, to your rescue again!

Q.1 What is Sweet Almond Oil?

Well, sweet almond oil is used in skin care routine, whereas, bitter almond oil gives the almond-y flavors and scent! So before purchasing any oil to follow any of the home remedies given above, ensure what is it that you are buying and if it will serve the purpose!

Q.2 Is Almond Oil Good For Oily Skin?

Oily skin can lead to acne. As stated earlier, the fatty acids in almond oil, help in dissolving the sebum and thus preventing pimples. Therefore, it is a good idea for oily skinned people to apply almond oil.

Q.3 Is Almond Oil Good For Lips

Yes! It will moisturize your lips and prevent chapped lips!

Cautionary Tip – It is common for people to have nut allergy, and if you are one of them, please steer clear of these remedies!

Light at the End of the Circle: 5 Home Remedies to Get Rid of Dark Circles

0

Dark circles, though serious looking, are relatively easy to get rid of from the comfort of your home.

If you’ve developed dark circles and are worried you’re going to be stuck with them forever, don’t be. These useful home remedies will help you get rid of dark circles for good.

5 Home Remedies to Get Rid of Dark Circles:

1. Almond Oil

A completely natural ingredient that benefits skin around your eyes, almond oil helps lighten dark circles. Combine almond oil with vitamin E oil and your dark circles will be history. Plus, these ingredients really something that’s a staple in every household.

Usage

  • Before hitting the sack, apply some almond oil over your dark circles and massage it gently into the skin.
  • Leave the oil on overnight.
  • Wash it off with cold water next morning.
  • Repeat this every day until your dark circles are gone.

2. Cucumber

Remember those Hollywood movies where women are seen relaxing at a spa with cucumber slices on their eyes? Well, there’s a reason beyond gloss. With skin-lightening and mild astringent properties, cucumbers are completely equipped to fix those raccoon eyes. Better yet, they are soothing and refreshing too.

Usage

  • Cut a fresh cucumber into thick slices and chill it for about 30 minutes.
  • Place the slices on the dark circles for about 10 minutes.
  • Wash the area thoroughly with water.
  • Repeat this process twice a day for one week to see results.

3. Raw Potato

Potatoes contain vital natural bleaching agents and used raw, they help lighten dark circles and reduce excess puffiness around your eyes.

Usage

  • Grate a couple of chilled potatoes to extract the juice.
  • Soak a cotton ball in the juice and place it on your closed eyes.
  • Make sure the juice covers the dark circles entirely.
  • Allow the juice to sit for about 15 minutes and rinse your eyelids well with cool water.
  • Repeat once or twice daily for 2 – 3 weeks to see results.             

4. Rose Water

There’s a reason mothers always advise their children to rinse their eyes with Rose Water when they’re sore. It not only rejuvenates skin and reduces dark circles but also has a soothing effect on tired eyes. Due to its mild astringent properties, it also works well as a skin toner.

Usage

  • Soak cotton eye pads in rose water for a few minutes.
  • Place the soaked pads on your closed eyelids.
  • Leave them on for about 15 minutes.
  • Follow this remedy twice daily for 2 – 3 weeks to see results.      

5. Tomato

Tomato, the fruit that’s used like a vegetable, is known to naturally possess powerful bleaching properties that can lighten skin very effectively.

Usage

  • Mix one teaspoon of tomato juice with one and a half teaspoon of lemon juice.
  • Gently apply this mixture on your dark circles and allow it to sit for 10 minutes.
  • Rinse it off well with cool water.
  • Follow this remedy twice a day for 2 – 3 weeks to see results.


They say. “A person travels the entire world in search of something that he finds at home”. So don’t go looking elsewhere for expensive cures to dark circles; they’re all right there in your kitchen.

9 Astonishing Benefits Of Glycerin For Face & Skin Whitening

0

Now use glycerine to keep your skin healthy. Not only is it a kickass product, but it also beats the others at treating skin problems.

I remember seeing glycerine in my grand mom’s bathroom cabinet. A small glass bottle with a faded label, I had no idea what it was used for back then. Today, I know better.

This organic compound, to give you a small chemistry lesson, is a mixture of sugar and alcohol. The liquid is thick, slightly sweet, has no colour and no smell. But it packs a punch when it comes to working magic on your skin. Many commercial beauty products use glycerine in their composition. But you can use it by itself (along with some other products found at home) and create your own arsenal of beauty treatment.

9 Interesting Benefits Of Glycerin For Skin:

#1 As a cleanser

The neutral properties of glycerine make it perfect for cleansing your skin of makeup and other impurities you picked up during the day.

#2 As a toner

Glycerine lessens the size of your pores and works as an excellent toner, especially for oily skin.

#3 As skin moisturiser

Glycerin act as humectant i.e. it helps it minimizing the water loss due to evaporation in oily skin and helps in keeping the skin hydrated always.

#4 To fight pimples, acne and blackhead

You can use glycerine for oily skin and all the problems it causes, such as pimples, acne and blackheads. It also helps you get rid of bacterial infections.

#5 For sensitive and baby’s skin

Glycerin absolutely safe to be used for skin which is one of the reason why it is also one of the ingredient in baby products

#6 As a sunscreen

Not as the only barrier against the harsh sun, but glycerine can help, up to a certain extent.

#7 For skin lightening

Do you know that you can also use glycerine for skin whitening? I have a recipe later in the article.

#8 For younger-looking skin

Your beauty basket should include glycerine for a face that looks younger than its years.

#9. For Dry Chapped Lips

The moisturizing properties of glycerin helps in getting rid of dry, chapped lips. It is especially great for winter when lips are chapped and sometimes even bleed because of extreme dryness.

Dos & Don’ts Of Using Glycerin For Skin:

  1. Don’t use glycerin directly on oily skin. Always dilute it preferably with rose water
  2. Never use glycerin in large quantities
  3. Do not leave it on skin for long time
  4. Make sure you wash you face well as glycerin might attract dust and pollution due to its sticky nature.

How To Use Glycerin For Skin & Face

Toner

  • You can make a solution of rose water and glycerine for face toning.
  • Simply mix one-fourth cup of glycerine and one and half cups of rose water in a spray bottle.
  • Use when required.

Cleanser

  • Make a solution using 3 teaspoons of milk and 1 teaspoon of glycerine.
  • Apply this all over your face and go to bed.
  • Wash it off the next morning taking care it doesn’t get into your eyes. Yes, it’ll sting.

Moisturiser

  • In a bowl pour 200-250 ml of glycerine.
  • Add two tablespoons of freshly-squeezed lime juice to it.
  • Mix this well and transfer the solution to a glass bottle.
  • Put this on your face and hands every night before sleeping.
  • Allow it to soak in before getting comfy in your bed.

Acne treatment

  • Make a solution using one tablespoon of glycerine, ½ a tablespoon of boric powder, camphor and a cup of distilled water.
  • Apply this to your acne-affected skin using clean hands or cotton.
  • Wash it off with lukewarm water after 5-10 minutes.
  • Splash cold water on your face to close your pores.

Anti-ageing treatment

  • Beat an egg in a glass bowl.
  • Add a teaspoon of honey and one teaspoon of glycerine.
  • Mix well and apply this mask to your face.
  • Wash it off after 20 minutes.

For fairer skin

You can combine bananas and glycerine for face whitening.

  • Mash an overripe banana.
  • Add a tablespoon of glycerine to it.
  • Mix well and apply all over your face and skin.
  • Wash it off after 10-15 minutes for a glowing, fairer looking face.

Since glycerine is non-toxic and doesn’t overpower the senses, it finds way in countless beauty therapies. Are you ready to try it?

11 Amazing Skin Benefits of Besan & 3 Simple Besan Face Packs for Fair Skin

0

Besides being an integral ingredient in the Indian cuisine, besan/gram flour can also work deliciously for your skin.

Whether in laddoos or as the covering for pakoras, besan (gram flour) is a much loved ingredient in many scrumptious Indian recipes. But did you know that besan also has immense beauty benefits? Your grandma knew it, and now here’s your chance to learn how to use besan for skin that glows with health.

We’ve put together some benefits of gram flour for skin. Easy, simple and quick recipes for a glowing, radiant complexion.

11 Amazing Benefits of Besan for Skin

#1 Tan removal

Besan is really useful as a tan removal agent when applied to skin. Here’s how you can use besan for tan removal at home:

  1. Apply a paste of 4 teaspoons besan, 1 teaspoon lemon juice, 1 teaspoon yogurt and a pinch of turmeric to your face and neck.
  2. Once it dries, wash it off.
  3. Doing this regularly removes every inch of skin tan.

#2 Lightens skin

You can also use gram flour for skin whitening. Here are 3 steps to use besan for far skin

  1. 4 teaspoons besan, when mixed with 1 teaspoon raw milk and 1 teaspoon lemon juice can help lighten skin.
  2. Apply the paste to your face, scrubbing gently in a circular motion, and let it dry.
  3. Wash with cool water.

Pro-Tip: If you don’t have time to make besan face pack, you can include Olay White Radiance Brightening Intensive Cream in your daily regime

#3 Reduces oiliness

Suffering oily skin? You’ve found a friend in Besan.

  • Mix besan and yogurt (or raw milk) and apply this paste evenly across your face.
  • Wash your face with cold water to remove it after 20 minutes.

 #4 Anti-pimples


This besan face pack is excellent to help fight pimples. Follow these 3 simple steps to clear pimples from you face:

  1. Make a paste of 2 teaspoons besan, 2 teaspoons sandalwood powder, 1 teaspoon milk and a pinch of turmeric powder
  2. Apply to every inch of your face.
  3. When it dries, rinse off with cool water.

#5 Lighten dark arms and neck


Prolonged exposure to the sun can lead to darkening of the neck and arms. Here are 3 simple steps to lighten your dark arms and neck using besan:

  1. A mix of besan, yogurt, lemon juice and a pinch of turmeric powder is a good way to lighten skin.
  2. Apply the mask to your face and wash off after 20 minutes.
  3. Repeat this three times a week to see a visible difference.

#6 As a body scrub


Besan has healing and exfoliating properties that make it the perfect homemade, all natural body scrub.

  • Combine 3 teaspoons besan, 1 teaspoon grounded oats and 2 teaspoons corn flour with a little raw milk.
  • The scrub removes dry skin cells, oiliness and dirt, leaving you with gorgeously clean and smooth skin.

#7 Removes facial hair


  • Banish that fine and not-so-fine facial hair with a pack made with fenugreek (methi) powder and besan.
  • Apply this paste over all unwanted facial hair and let it dry.
  • Scrub gently while washing it off.
  • A face pack prepared with besan, lemon juice, malai and sandalwood powder works with equal aplomb.

#8 Fades Acne Scars

  • Take 1 tablespoon of besan, ¼ tablespoon of turmeric and 1 and ½ tablespoon of fresh yogurt in a bowl
  • Mix all the ingredients together to make a fine paste
  • Apply this on your face wherever you have spots, acne scars and blemishes
  • Wait for it to dry completely and then wash it off with cold water
  • After multiple applications of this face pack, you will see a visible change in your scars

#9 Improves Dry Skin Condition

  • Take a little besan and mix it with turmeric
  • Add a little milk cream to this dry mixture and make a fine paste
  • Apply this face pack on your face and neck
  • Wash this face pack when it is about to dry completely
  • This will lighten your complexion and also help you with your dry skin

#10 Helps in Getting Rid of Blackheads

  • Take 4 teaspoon of besan, 2 teaspoon of curd, 1 teaspoon of turmeric and 2 teaspoon of honey
  • Mix all the ingredients together to make a paste
  • You can change the quantity of the ingredients dependent on your needs, but keep the ratio constant
  • Apply the mixture on your face
  • Wash it off with lukewarm water after 20 minutes
  • Besan will act as a scrub and help you in getting rid of blackheads

#11 Anti-Ageing Properties

  • You will need green gram flour, honey, egg white and lemon juice for this anti-ageing face pack
  • Take egg white in a bowl and add a little lemon juice to this. Whisk it lightly
  • Add a little honey to the above mixture and finally add green gram flour
  • Mix the ingredients thoroughly into a fine paste
  • Wash your face with warm water to open all clogged pores
  • Apply this face mask in a circular motion all over your face
  • After 15 mins, wash it off with warm water
  • Apply oil-free moisturizer post washing for youthful skin

If you wish to get fair skin, try one of these face packs:

3 Simple Besan Face Packs for Blemish-free, Fair Skin

#1 Milk and besan face pack

  1. Mix 2 tablespoons of besan with 1 tablespoon of yogurt or 2 tablespoons of milk
  2. Apply the paste to your skin and let it dry
  3. After 20 minutes, wash it off with cold water
  4. Don’t rub but pat your skin dry

#2 Besan and almond face pack

  1. Mix 4 powdered almonds, 1 tablespoon milk, ½ teaspoon lemon juice and 1 teaspoon of besan
  2. Apply the paste to your face and neck
  3. Let it sit for 30 minutes
  4. Wash your face with cool water and pat it dry

#3 Besan and cucumber face pack

  1. Make a paste using 2 tablespoons besan, 2 tablespoons cucumber juice and 5 drops lemon juice.
  2. Spread the paste all across your face and neck.
  3. Let it stay for 30 minutes and then rinse it with cool water.

You need to apply any of these besan fairness face packs at least twice a week for 3-4 months to see a visible difference in your skin complexion.

Now that you know all that this simple, most common ingredient can do, will you make it part of your beauty regimen?

The 15 Best Remedies to Remove Sun Tan Instantly.

0

While avoiding a tan is impossible owing to Indian summers, removing one isn’t. Now do it economically, from the comfort of your home.

When the summers arrive you’re faced with a dilemma. That’s because the summers are for being outdoors but you’re worried for your skin. One is because of its propensity to tanning and two is because you know that chemical bleaching can hurt your skin more than help it. So what is the solution to this dilemma? Simple, read our top tips to remove tan naturally.

15 Natural Ways to Remove Sun Tan Instantly

1. Lemon Juice

  • Cut a lemon and rub a slice on your tanned skin.
  • Allow it to sit for some minutes before washing it off.

2. Cucumber Extract, Lemon Juice and Rose Water

  • Mix one tablespoon of each of the 3 ingredients in a bowl and dab it generously on your tanned skin.

3. Bengal Gram Flour and Turmeric

  • Mix a tiny amount of turmeric with two tablespoons of Bengal gram flour, milk and one-tablespoon rose water.
  • Apply to tanned areas and leave it be for 15-20 minutes before taking it off.

4. Masoor, Tomato and Aloe

  • Soak one tablespoon of masoor dal in water and make it into a paste.
  • To this add equal quantities of aloe extract and tomato paste.
  • Apply on tanned areas of your face and let it sit for 30 minutes before using cold water to wash it off.

5. Honey and Ripe Papaya

  • Mash up about half a cup of papaya with one-tablespoon honey.
  • Apply on tanned areas and let it sit for 30 minutes before using cold water to wash it off.

6. Oat Meal and Buttermilk

  • In 3 tablespoons of buttermilk add 2 tablespoons of oatmeal.
  • Using circular movements, massage it onto the tanned areas. Easy!

7. Yogurt and Tomato Extract

  • Mix up one tablespoon of each ingredient and slather the paste that’s formed on tanned areas.
  • Let it be for half an hour before washing off with water.

8. Orange Juice and Yogurt

  • Mix one tablespoon of orange juice in yoghurt and apply to tanned areas.
  • Leave it on for half an hour before rinsing it off with water.

9. Milk Cream and Strawberries

  • Mash 5 strawberries in two tablespoons of milk cream.
  • Apply it generously ontanned areas and give it half an hour before you wash it off.

10. Potato Juice and Lemon Juice

  • Take the juice from a medium potato and mix it with one tablespoon lemon juice.
  • Apply, leave on for 30 minutes and rinse.

11. Sandalwood Paste

  • This one’s simple; apply sandalwood paste every night before you sleep.
  • Ideally, wash it off when you wake up.

12. Sandalwood Powder and Coconut Water

  • Thoroughly mix one tablespoon sandalwood powder in coconut water and apply on tanned areas.
  • Leave on for a few minutes then wash off.

13. Pineapple Pulp and Honey

  • Mix the pulp of a pineapple with about one tablespoon honey.
  • Apply it on tanned areas generously.

14. Turmeric and Milk

  • Mix a small amount of turmeric powder in milk.
  • Give your face a good application with the mixture that is formed.
  • Let it dry.

15. Vicks Vapor Rub

  • Though unconventional, vicksvapor rub has proven, many a times, to be pretty effective in treating skin that is sunburnt.

These are effective sun tan removal home remedies. But as everyone says, prevention is better than cure, you can use Olay Natural White 7 IN ONE Glowing Fairness Cream which has an SPF of 24 and is a moisturising lotion. So it helps protect skin efficiently from the sun.