Home Blog Page 29

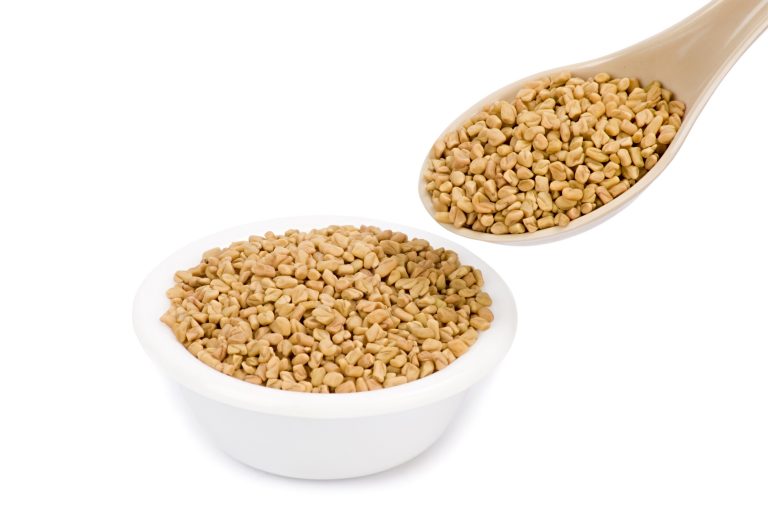
13 Ways Fenugreek (Methi) Seeds Benefits Your Hair Health

0

From hair loss to dandruff to baldness, those yucky methi seeds can open up a world of goodness for your hair and scalp.

“Yuck Mom, I hate methi, it tastes awful”, are probably your first memories of this glorious vegetable. Well let me tell you, your mother is never wrong. Fenugreek or Methi is just packed with goodness and nutrition. And you’re reading this article because you already know that and you know now that it’s always a good idea to listen to your mother.

With what is Methi Fortified and The Various Benefits of These Nutrients?

  • Fenugreek is great for your hair, skin, body, digestion, heart, you name it.
  • It relieves constipation, helps cure things like mouth ulcers, bronchitis, chronic coughs and even cancers.
  • If you’re a breastfeeding mom, methi seeds help you lactate more.
  • Fenugreek benefits your hair greatly
  • It is packed with Protein, which helps fight baldness
  • It also has great amounts of Vitamin C, which helps boost your immunity
  • Methi is also rich in Iron, which is good for your blood circulation
  • Fenugreek is also rich in Potassium, which prevents against greys
  • It is also a source of Nicotinic Acid, which encourages hair growth and Lecithin, which energizes hair follicles.

13 Amazing Benefits of Using Fenugreek or Methi Seeds for Your Hair


1.    Fenugreek Seeds for Hair Fall

Methi for hair fall is not a far-fetched notion now that you know what fenugreek is made up of.

  • Soak the fenugreek seeds overnight
  • Blend them with a bit of water or lemon juice.
  • Apply it to your hair like a face pack and don’t worry about shampooing it off, it will wash right off.  
  • But remember to use a mild shampoo like Pantene Pro-V Hair Fall Control, which also strengthens your hair from root to tip.

2.    Methi Seeds for Hair Growth


Fenugreek seeds for hair growth is really the best thing ever!

  • Boil fenugreek with coconut oil until the seeds go reddish
  • Then apply the warm oil on your scalp.
  • You will be amazed as to how this wonderful concoction will boost your hair growth

3.    Methi for Excess Oil on Scalp


  • Make a paste of fenugreek seeds and 2 teaspoons apply cider vinegar (after soaking together overnight)
  • Apply to your hair to control the excess oil
  • Wash it off with a mild, clear shampoo, as creamy shampoos tend to make your hair greasier

4.    Methi for Dry & Itchy Scalp


  • If you’re suffering from a dry and itchy scalp an easy fenugreek seed paste combined with an egg yolk is the cure
  • Leave the mask on for 30 minutes
  • Wash it out with a mild shampoo

5.    Fenugreek Hair Pack for Dandruff


  • For dandruff, just combine the paste of fenugreek with yogurt
  • Apply 3 times a week for a sure cure
  • Ensure to wash off every particle of methi off your hair with a mild shampoo

6.    Fenugreek Seeds for Shiny, Luscious Hair


  • Leave a glass of water with fenugreek seeds to soak over night
  • Drink this water the next morning sans the seeds for luscious hair

7.    For Premature Greys


  • Make a paste of fenugreek seeds and curry leaves or curry patta
  • Apply it to your hair for about 30 minutes, this is an ingenious way to prevent premature greys
  • Wash it off with mild shampoo and cold water

8.    Fenugreek Seeds for Damaged Hair


Miracle working fenugreek seeds can also reverse damage caused to your hair like split ends, frizz and general weak hair.

  • Mix your fenugreek paste with coconut milk and apply to your hair.
  • Leave it in and cover your hair with a towel for about half an hour so it soaks up all the goodness
  • Wash it off with a mild shampoo and cold water
  • Do this regularly to see the magic happen

9.    Methi Seeds as Hair Conditioner


  • Take 10-15 grams of methi seeds
  • Soak them in water overnight
  • Next morning, grind it into a thin paste
  • Apply it on your hair and leave it on for at least 30 minutes
  • Wash it with water and mild shampoo
  • This will deeply condition your hair

10. Fenugreek Seeds for Lustrous, Glossy Hair

  • Take 25 grams of soaked methi seeds, 25 grams of curd, lemon juice, honey and water
  • Blend all the ingredients together in to fine paste
  • Apply this hair pack all over your hair
  • Wash this hair pack with a mild shampoo after 45 minutes
  • This hair gives shine, prevents dandruff and hair fall as well

11. Fenugreek for Soft, Frizz-Free, Detangled Hair

  • Take a few tablespoons of dry methi seeds
  • Wash it to remove dirt and then soak it overnight
  • Next morning, blend the seeds into a thin paste
  • Add a little coconut oil to this paste and mix well
  • Apply this mask to your hair and scalp
  • Wash it off with a mild shampoo after 30 minutes
  • You will soft and shiny hair after this treatment

12. Methi Seeds For Dry Hair

  • Take a handful of methi seeds that have been soaked in water overnight and grind it to a fine paste
  • Add a little curd to this paste along with honey and olive oil
  • You can also oil your hair overnight and skip putting olive oil in the hair pack
  • Mix the ingredients in the paste and apply it on hair and scalp generously
  • Wash the paste after 45 minutes with a mild shampoo and conditioner
  • Do this ritual twice a week to get gorgeous hair naturally

13. Methi for Curly Hair

  • Methi also helps in defining your curls by removing the frizz from the hair
  • Soak 4-5 tablespoons of methi overnight in double the quantity of water. You can have boiled water as a soaking agent
  • Next morning strain the gelatinous water
  • Take this sticky water and rinse your hair post your shampoo routine
  • Leave it on your head for at least 10 minutes
  • Wash it off with water after sometime
  • It will dry faster and give your curls a lovely bounce without any hair products

Now that you know the various benefits of using fenugreek (methi) for your hair, we suggest you try and include this in your daily hair care routine by either of the ways recommended above and let us know your experience with methi in the comments below!
Try These 8 Amazing Besan Face Packs to Get Healthy, Glowing Skin

0

Besan is a popular beauty remedy across Indian homes for its skin brightening properties. These 5 basic besan face packs will show you why.

You may have at one time or the other tried besan for skin, to put the glow back, to remove tan and pigmentation, or to get smooth and supple skin. What makes besan a hot favorite is its ability to cleanse skin while maintaining the skin’s pH balance. Other besan benefits are that it is antimicrobial and keeps skin moisturized.

Besan is inexpensive and easily available; you can purchase it at stores or make the flour at home. The effects of besan depend on the ingredients that are used with it and your skin type. You could make a paste with just water, or could try a homemade besan face pack for gorgeous skin.

How Is Besan Good For Skin?

Besan is that one staple ingredient from our naani ma’s beauty book, which has been passed on from generation to generation. Besan resolves almost all skin problems and is really an inexpensive beauty remedy!

  • Glowing Skin
  • Better Skin Tone
  • De-tanning
  • Facial Hair Removal
  • Acne Removal

The above mentioned are the top few benefits of besan for skin.

8 Essential Besan Face Packs for All Skin Problems

#1 Besan Pack for Glowing Skin

  1. To put the glow back in your face, mix around two tablespoons of besan, a few drops of lemon juice, and around one tablespoon of milk cream.
  2. The consistency of the mixture should be smooth.
  3. After cleaning and drying your skin using a cleanser or rose water, apply this mixture evenly all over your face and neck. Don’t forget your ear lobes.
  4. Keep it on for 15-30 minutes and once it is dry, wash it off with cold or lukewarm water.
  5. Pat your skin dry and watch your skin glow!


#2 How to Remove Tan with Gram Flour? Easy Besan De-Tan Pack

  1. A combination of besan, papaya and orange juice is great to even out skin and remove tan.
  2. You can begin by mashing papaya pulp without the skin of the fruit.
  3. Add around two tablespoons of orange juice and around one tablespoon of besan. The mixture should not be too thick or too runny.
  4. Apply this mixture on your face and neck, and wash off after 30 minutes. T
  5. The results are instant. Regular use of this pack will keep your skin smooth and supple, and will even out the skin tone.


#3 Toning Face Pack Using Besan

  1. For toned skin, all you need to do is make a paste with besan and rosewater; the latter is known to be a good skin toner.
  2. Leave the pack on until it dries and then wash it off with cool water.
  3. Rub your skin in gentle, circular motions while washing.
  4. Pat dry and finish by rubbing ice cubes on your face.
  5. Your skin will feel refreshed, and regular use of this pack will reveal toned and glowing skin.
  6. If you have dry skin, you can add honey to the mixture. Honey softens your skin and bleaches it.


#4 Skin Nourishing Besan Face Pack

  1. This pack packs in the goodness of milk and almonds along with besan and lemon juice.
  2. Powder a few almonds, around five to six should be enough.
  3. Add this to the besan, and pour in a little milk and some lemon juice to make a mixture that is not too watery or too thick.
  4. Apply the paste and allow it to dry, and wash it off with cool water.
  5. This pack cleans, lightens and moisturizes your skin.


#5 Hair Removal Pack

  1. Besan is often used to make a pack that is used to remove fine facial hair.
  2. You can mix besan with egg white, sugar and corn starch.
  3. Start by cleansing your face and drying it.
  4. You can then apply this pack and rub it into skin with gentle, circular motions.
  5. Then, apply a layer of the mask on your skin and allow it to dry out completely.
  6. Wash it off with cold water and pat your skin dry.
  7. This needs to be done regularly to see results.


#6 How to Use Besan Face Pack (Gram Flour Pack) For Skin Whitening

  • Take 2 tablespoons of besan in a bowl
  • Add 1 teaspoon of lemon juice to this flour
  • Pour a little milk to make a thick paste
  • Apply this thick paste to your face and wash it off after 15 minutes with cold water

You can also apply besan and turmeric face pack for fair skin. Simply replace lemon with turmeric in this face pack.


#7 Besan Face Pack for Acne and Pimples

  • Take 1 tablespoon of besan, half tablespoon of turmeric and rose water (can also use dahi if rose water is unavailable)
  • Mix all the ingredients to make a thick paste
  • Apply this face pack and leave it on for 20 minutes
  • Wash it off with cold water


#8 Besan Face Pack For Daily Use

  • In olden times besan was used as a cleansing agent, basically as a soap. If you have oily skin, you can apply besan face pack (besan + rose water) on face almost daily to get oil free skin.
  • However, do not use besan daily for dry to normal skin, as it has a tendency to dry out the skin.

You can try these packs out, maybe one pack a month, once a week, and stick to the face pack that gives you the best results and that is most suitable for your skin. And don’t forget to take care of your skin every day with sunscreen and moisturisers like Olay Total Effects 7 in One Anti-Ageing Day Cream with SPF 15.

Now, after learning so many benefits and besan face packs, you must be wondering if there are any side effects of besan!

Side Effects of Using Besan (Channa Dal) on Face

Many people are allergic to besan and hence can have skin irritation upon using besan. It could also lead to something serious.

Pro-Tip: It is always better to do a patch test, before starting a full-fledged routine.

6 Advantages & Disadvantages of Waxing Facial Hair

0

Waxing facial hair has different effects on different people. Find out how and why.

Waxing, at the most basic level, uproots hair. This means that it removes hair from its root. While getting rid of facial hair is possible using various methods like bleaching, threading and laser treatments, facial waxing is considered to be a method that resounds with most people; most people, not all. Why? Well, here we examine the pros and cons of waxing facial hair, be it at a salon or facial hair removal at home.

6 Pros of Waxing Facial Hair:

  1. Perfect for women who suffer from a lot of facial hair. Women with considerable facial hair tend to bleach it, often with disastrous results. Golden facial hair is never a golden sight.
  2. While shaving facial hair makes the hair that grows back hard, waxing uproots the shaft of the hair. So, the hair that grows back is smooth. And smooth is sexy.
  3. The effects of waxing last for about two or more weeks, which is pretty good in comparison to shaving. The last thing you want is anything that resembles a beard growing on your face.
  4. Waxing is precise whereas other techniques aren’t. While shaving cannot guarantee all facial hair will be evenly removed, bleaching can turn out patchy with abnormal golden gradients of hair.
  5. Waxing damages your hair follicles; this is not a bad thing because it reduces the growth of hair and over time your face will be completely hair-free. After all, isn’t being hair-free the real pursuit of happiness here?
  6. Waxing is economical and can even be done at home. While shaving is also equally economical, it isn’t as effective. Plus women, unlike men, aren’t that adept at it. Bleaching is just outright expensive.


6 Cons of Waxing Facial Hair:

  1. It’s painful because the skin on your face is sensitive. Yes, no pain no gain pretty much encapsulates the waxing experience.
  2. Waxing sometimes leads to unsightly patches of blood on your face. But trust us, it’s not as scary as it seems.
  3. Waxing done wrong can cause skin irritation, discoloration, burns, infections and even allergic reactions. Which is why, you have to take care to learn the craft of waxing or leave it to a professional.
  4. You have to repeat the process many times for best results. This means more pain.
  5. If face waxing fails then ‘ingrown’ hairs can be formed. This leads to whiteheads and puss-filled boils.
  6. Once you wax, you will be homebound for a minimum of 24 hours. Yes, your skin is sensitive during this period and vulnerable to infection.

So, the choice is yours really. Are you the no pain, no gain kind of woman or would you rather not go through the pain and possible skin problems of facial waxing? Take your pick.

Pack a Gorgeous Glow with These 5 Homemade Multani Mitti Packs

0

Multani Mitti is a natural wonder for your skin owing to its skin healing, improving and nourishing properties.

Whether you have dry, dull or acne-prone skin, a multani mitti face pack is a sure fire skin saviour. It is an excellent skin cleansing agent, ridding your skin of dirt, oil and grime while its high absorbing properties leave the skin feeling soft and radiant. Multani mitti face packs are highly effective no matter what your skin concern so make sure to include them in your daily skin care routine.

1. Multani Mitti Face Pack for Oily Skin

Say goodbye to oily skin: Rich in magnesium chloride, multani mitti helps reduce acne and remove blackheads.

  1. To a tablespoon of multani mitti, add a teaspoon each of sandalwood powder, rose water and milk.
  2. Mix them and apply the mixture to your face.
  3. Leave it on for 20 minutes before rinsing off with cold water. It is gentle enough for daily use.
  4. If your skin is susceptible to break outs and pimples, this face pack will balance the skin’s pH levels, control oiliness and reduce inflammation.Multanimitti for pimples is an effective, safe and natural solution.


2. Multani Mitti Face Pack for Gorgeous Glowing Skin

Get a gorgeous glow: Multani mitti adds natural oils to your skin nourishing it from within & making it glow naturally.

  1. Take two spoons of multani mitti, a spoon of tomato juice and a dash of sandalwood powder.
  2. Make this into a fine paste.
  3. Add a pinch of turmeric powder to this mixture.
  4. Apply to your face and leave it on for 10 – 15 minutes.
  5. Wash it off with warm water.
  6. Use it once a week and watch your natural glow return, leaving your skin feeling refreshed and radiant.

Also, multani mitti helps to lighten your complexion. You can also try these 15 amazing tips to get fair skin along with this multani mitti face pack!


3. Multani Mitti Face Pack for Flawless Skin

Hello, flawless skin: Multani mitti helps remove pesky blackheads and whiteheads.

  1. Mash half a cup of papaya into a pulp.
  2. Add a tablespoon each of multani mitti and honey.
  3. Mix it well and apply it on your face and neck.
  4. Leave it on for 15 minutes and wash it off with warm water.
  5. Dark patches and blemishes will disappear and it will smooth uneven skin tone, leaving your skin looking stunning and supple.


4. Multani Mitti Face Pack for Sun Damage Control

No more sun tan: Known for soothing irritation and cooling down inflamed skin, multani mitti heals sun damage gently.

  1. Mix one tablespoon multani mitti with a teaspoon each of tomato juice, lime juice, milk and honey.
  2. Apply it on your face and leave it on for 15 minutes before washing it off with cold water. This soothes sun tan and reduces the appearance of dark spots.


5. Multani Mitti Face Pack for Dry Skin

Adios dry skin woes: While it nourishes dry skin, multani mitti also adds a much needed radiance to dull skin.

  1. Crush 4 almonds into a fine paste with a few drops of cold milk.
  2. Add a teaspoon of multani mitti and honey to this mixture.
  3. Apply it to your face and leave it on for 10 minutes.
  4. Wash it off with cold water and watch your skin transform from flaky to soft, smooth and supple.

6 Simple Ways To Confirm Pregnancy Without A Kit

0

Home pregnancy tests are incredibly efficient. But since time immemorial, these old-fashioned ways have been used to confirm pregnancy.

 While a scientific pregnancy test is the best way to confirm pregnancy, there are a number of historical, non-medical ways that were used before these miraculous devices were invented. 


1. Stored Urine Test
:

  1. Collect your urine in a bottle or vessel like you would for a normal urine test.
  2. Then leave it untouched for about 3-4 hours.
  3. If a white film forms on the surface of the urine, chances are you may be pregnant.
  4. If there is no change in the urine and it remains clear, you are not pregnant.

2. Wheat and Barley Test:

This practice originated in ancient Egypt and in recent times was even tested in a laboratory to yield 70% accurate results. Women are advised to urinate on wheat and barley seeds over the course of several days; if the wheat sprouts, she is to have a baby girl, and if the barley sprouts, a boy. If neither sprouts, she isn’t pregnant.

3. Toothpaste Test:


Since the first urine of the day holds the secret, collect it in a bottle. Take some white tooth paste and add the urine sample to it. Let it stand for a couple of hours. If it changes colour or begins to froth, you probably are pregnant.

4. Bleach Test:

  1. Collect the first urine of the day and add some bleaching powder to it.
  2. If the urine starts fizzing and foaming, there is a good chance you may be pregnant.
  3. If you cannot get your hands on bleach, try using a concentrated soap solution.

5. Mustard Powder Test:


Mustard powder is considered to be a period inducer. So if you have missed your period or it is delayed, soak in a bath prepared with 2 cups of mustard powder followed by a warm shower. If you get your period after this in a day or two, it was probably just a false alarm. But 2 weeks after this test, if there is still no sign of your period, you are most likely pregnant. 

6. Look for the Sign:


In the early stages of pregnancy – roughly at six to eight weeks, the cervix, labia and vagina can take on a dark bluish or purple-red colour due to increased blood flow to the area. This sign shows up much before food cravings or nausea. It was first noticed in 1836 by a French physician. In 1886, James Read Chadwick, an obstetrician bought up the discovery at an American Gynaecological Society meeting and is today known as ‘Chadwick’s Sign’.  

There is no shortage of non-medical ways to find out if you are having a baby. Many of these ways are inaccurate old wives tales. But while you play the wait and watch game, they are fun to play with, and don’t involve anything dangerous – just a bit of urine sample. 

12 Amazing Benefits of Henna for Hair Growth & Hair Health

0

Who said henna is just a hair dye? Each of henna’s countless uses aim at giving you a healthy scalp and strong hair.

Henna is one of the best hair beauty ingredients that India has shared with the rest of the world. Since years, if not centuries, women have used the power of this natural compound to strengthen, nourish and beautify their tresses. Back then, they would use the leaves of henna for hair treatment; the modern woman use henna powder for hair therapy.

Among the most commonly known benefits of henna for hair is that it is a natural hair colouring agent and conditioner. But do you know of the many other reasons you should seriously consider for using henna powder in your beauty regime?

Is Henna (Mehndi) Good For Your Hair? – 12 Hair Care Benefits of Henna

#1 Henna improves hair growth

The natural properties of henna promote hair growth. The powder can be used to create an essential oil that nourishes and encourages growth.

  • Boil 250 ml gingili oil until it starts to smoke.
  • Add 5 cups henna powder to the oil and let it boil for 5-6 minutes.
  • You can apply this essential oil to your hair 2-3 times a week.

#2 It reduces hair fall

The combination of henna powder and mustard oil is an excellent remedy for hair fall.

  • Boil 250 ml mustard oil.
  • Add a few henna leaves and continue boiling.
  • Use the oil to massage your hair and scalp 2-3 times a week.
  • Use up the oil within a month.

#3 How to Apply Henna on Hair for Deep Conditioning

Henna is a deep conditioner that leaves your hair feeling absolutely gorgeous.

  • Make a regular tea decoction and let it cool.
  • Mix enough henna powder till it forms a thick paste.
  • Add 3 tablespoons lemon juice.
  • After 30 minutes, add 2 tablespoons curd.
  • Now apply this paste to your hair.
  • Rinse off with a mild shampoo after an hour.

#4 Mehendi prevents dandruff

Using henna regularly on your hair cures dandruff and prevents it from coming back.

  • Soak methi seeds in water overnight and grind the next morning.
  • Add henna and mustard oil.
  • Apply this paste on your scalp and hair.
  • Rinse it off after 30 minutes with your regular shampoo. Don’t forget to condition your hair.

#5 Henna controls scalp itchiness

Henna has antifungal and antimicrobial properties that cool and soothe your scalp. This controls scalp itching.

  • Grind a cup of henna leaves, half a cup of neem leaves and half a cup of tulsi leaves with water.
  • Apply the paste on your hair and wash off after an hour.

#6 It is a natural hair dye

If you are reluctant to use chemicals on your scalp but want to cover greys, henna is a natural alternative.

  • Add egg and honey to the powder and soak the mixture in an iron vessel for a deeper, richer colour.
  • Remember not to apply henna on your scalp while colouring as this can dry it out.
  • Oil your hair adequately afterwards to prevent drying.

If you want a non-egg version of this henna dye, follow the steps given below:


How to Prepare Henna (Mehendi) Hair Color Pack

  • Take henna powder in a bowl
  • Sift this henna to ensure no lumps are present in the henna taken to apply on the hair
  • Add a little black tea water in this henna
  • And let it soak for over 6-8 hours
  • Apply this paste on hair and wash it off with water (no shampoo or conditioner)
  • Take a little indigo powder and add a little warm water to get a thick consistency
  • Apply this paste on the hair and wash it off after 30 minutes
  • Use a shampoo and a conditioner after 1-2 days of this entire process to get a deep black colour

#7 It repairs splits ends

Dry and damaged hair is prone to split ends, which worsen the situation. Henna breaks this vicious cycle and gives you deeply conditioned and nourished hair.

  • Make a paste of henna powder, 2-3 teaspoonful avocado oil and an egg.
  • Add a little water if it seems too thick.
  • Apply this to your hair, and try and get every strand covered.
  • Keep it on for at least 2 hours.
  • Rinse off with lukewarm water.

#8 It maintains balance and keeps scalp clean

Henna retains the natural acid-alkaline balance on your scalp. It removes dirt and oil without messing this balance, unlike chemical-based products.

#9 It makes your hair thick and lustrous

Regular use of henna in your hair not only prevents hair fall, but you can use henna for hair growth and get locks that are healthy, thick and lustrous.

  • Soak henna in black tea overnight
  • Add a little lemon juice to this henna pack
  • You can even add an egg or a little curd to this mixture
  • Apply this paste for 20 minutes before washing it off
  • This hair pack will give you shiny hair instantly!

#10 It makes your hair shiny, soft and manageable

Henna’s nourishing properties make it perfect to turn dry, damaged and unhealthy hair into soft, shiny and manageable locks.

  • Soak henna in water overnight. It should have a thick paste consistency
  • Add mashed banana to this paste in the morning
  • This henna banana conditioner can replace your regular conditioner
  • Apply the mixture to your hair and wash it off after 5 minutes with cold water
  • This hair pack makes your hair manageable!

#11 It can be used for Oily Scalp

This overnight Multani mitti and henna hair pack ensures that your oily scalp does not cause any hair fall

  • Mix Multani mitti and henna with some water. It should have a paste consistency
  • Apply this hair mask and wrap it with a towel
  • Keep this overnight
  • Wash the hair pack in the morning with a mild shampoo, ideally a sulphate-free one!

#12 Mehendi for Dry Hair

Warm coconut milk and add a few tablespoons of henna to it along with a few tablespoons of olive oil. Remember the quantity of henna needs to be double of olive oil.

  • Mix the ingredients to a thick consistency
  • Apply this hair pack evenly on your hair and scalp.
  • Keep it for an hour and then wash your hair with a mild shampoo and conditioner

A word of caution. Make sure you purchase organic or authentic henna. The market is flooded with products that claim to be natural but are filled with chemicals. Also remember to use a mild shampoo and conditioner like Pantene Pro-V Silky Smooth Care Shampoo and Conditioner.

10 Home Remedies To Treat Dandruff At Home

0

Solve your embarrassing, confidence lowering dandruff problem using these 10 home remedies. No longer shelling out money at a salon!

Dandruff, also called Seborrhoea, targets the scalps of many people, young and old. What’s more, it leads to other skin issues like pimples and acne. Before we can discuss how to cure dandruff, let’s understand what causes it. Poor hair brushing and shampooing habits, dry skin, stress and improper diets, will make your scalp more prone to dandruff. Now that you’re aware of the causes, it’s time to fight dandruff.

1. Coconut Oil & Lemon Massage

Coconut oil nourishes your hair, while lemon juice helps to treat dandruff at home without using harmful chemicals. Given below is the easiest dandruff home remedy:

Step 1: Heat 2 tablespoons of coconut oil and mix it with equal amounts of lemon juice.

Step 2: Massage your scalp gently with the mixture.

Step 3: Leave it on for 20 minutes before rinsing if off with shampoo.

2. Fenugreek Pack as a Dandruff Remedy

This home remedy for dandruff uses fenugreek seeds. Follow the instructions below to use fenugreek pack to cure dandruff:

Step 1: Soak some fenugreek or methi seeds in water overnight.

Step 2: Drain the leftover water and mash the softened seeds into a paste.

Step 3: Let the paste sit for about an hour.

Step 4: Rinse it off with a mild shampoo.

3. Curd

Treating dandruff at home with curd is a little messy but very effective. Method for using curd as a home remedy for dandruff is given below:

Step 1: Apply some curd to your hair and scalp.

Step 2: Let it sit tight for about an hour.

Step 3: Rinse it off with a shampoo that’s mild.

4. Baking Soda is a great home remedy for dandruff

Dandruff treatment can be carried out at home with baking soda as well. The remedy to use baking soda for dandruff treatment is given below:

Step 1: Wet your hair slightly.

Step 2: Keeping your hair wet, rub a spoonful of baking soda on your scalp.

Step 3: Leave it on for 60-90 seconds prior to washing it off.

5. Tea Tree Oil

Tea tree oil is another way to cure dandruff at home. Follow the instructions given below to treat dandruff at home easily:

Step 1: Pour a few drops of tea tree oil on your scalp and spread it evenly.

Step 2: Let it soak for 5 minutes.

Step 3: Wash it off with a mild shampoo.

6. Apple Cider Vinegar can be used too, to remedy dandruff at home

Treating dandruff and hair fall at home can be a bit tricky. Apple cider vinegar is one of the best home remedies for dandruff and hair fall. Learn how to treat dandruff with apple cider vinegar below:

Step 1: Mix equal parts of apple cider vinegar and water and set it aside.

Step 2: After a regular hair wash, apply the mixture on your wet hair.

Step 3: Massage your scalp well and leave it on for 15 minutes before rinsing it off.

7. Henna or Mehndi

Cure dandruff with this simple henna remedy. Henna softens your hair, while lemon juice works its wonder in dandruff treatment.

Step 1: Mix Henna or Mehndi with tea liquor, curd and a dash of lemon juice.

Step 2: Set this mixture aside for approximately 8 hours.

Step 3: Apply it on your scalp and hair.

Step 4: Leave it on for about 2 hours and then wash off thoroughly.

8. Neem Juice helps cure dandruff at home

Neem has anti-bacterial properties and is an amazing home remedy for dandruff. The method given below is easy and mess-free.

Step 1: Grind a bunch of neem leaves in a food processor to form a thick paste.

Step 2: Apply this paste on your scalp and let it sit for 10 minutes or so.

Step 3: Wash it off with water.

9. Multani Mitti Hair Pack

Multani mitti helps to restore hair health. This simple dandruff remedy using multani mitti gives you soft, silky hair and dandruff-free hair.

Step 1: Make a thick paste using multani mitti, water and a dash of lemon juice.

Step 2: Apply this mixture on your hair and scalp and leave it on for about 20 minutes

Step 3: Rinse it off with water.

10. Orange Peel Pack works well as a homely dandruff treatment

Orange peel is another dandruff remedy that can be tried at home. Read how to use orange peel pack for dandruff removal below:

Step 1: Throw an orange peel in a food processor and squeeze in some lemon juice too.

Step 2: Grind all the ingredients into a paste.

Step 3: Apply this paste on your scalp and let it sit for 30 minutes before washing it off with a mild shampoo.

Remember, all these remedies need to be applied at least thrice a week for best results; continue to do so till you see the difference. Aren’t you happy that you’re now empowered to do your own dandruff treatment at home?

Learn How To Use Beetroot & Beetroot Juice For Hair Growth In 5 Ways

0

What if we told you that you can have naturally red hair without the use of any harsh chemicals? Not only does beetroot make one hell of a natural hair dye, it also tends to improve the health of your hair and leave you feeling like a Disney princess.

Beetroots have always been considered a superfood. Its vibrant red hue not only makes it a beautiful addition to your dish, but also provides you with some amazing health benefits. It is high in anti-oxidants, Vitamin A, Vitamin C, Calcium, Iron and Potassium. With all its minerals and nutrients waiting to enhance your life, we had to make sure that you knew about some of the beetroot benefits for hair. 

You can also use beetroot for hair growth, owing to the carotenoids present in it, which allows for better blood circulation in the scalp and nourishes the hair follicles from within. Beetroot for hair has been known to prevent hair loss as well. We’ll clue you in on how to use beetroot for hair colour in a while. First, let’s talk about how to get you started on your journey towards glamorous hair!

5 Ways To Use Beetroot For Healthy Hair:

1. Prevent Premature Balding And Hair Loss:

  1. Take the juice of two beetroots, freshly grated ginger juice and 2 tablespoons of olive oil.
  2. Mix it to form a paste and work it all the way into your scalp, to the tips of your hair.
  3. Keep for around 15-20 minutes, during which you can figure out what to do with that red juice seeping down your back!

2. Relief From An Itchy Scalp:


  1. Cut up a beetroot into two halves and directly rub it on your scalp.
  2. Its juice will seep into your scalp and remove dead skin cells, moisturising it from within. Leave it in for 15 minutes for dandruff and itch free scalp.
  3. Repeat it once in a week and bask in your hair’s naturally healthy shine!

3. As A Hair Mask:


  1. All you need is the juice of 2-3 beetroots (depending on your hair length) and some ground coffee.
  2. Mix both together to form a hair mask and apply it to your hair. 
  3. Leave it in for an hour and then rinse thoroughly with lukewarm water.
  4. There are umpteen beetroot uses, not only to prevent hair loss, but to improve the overall quality of your hair as well.
  5. Get back your hair’s thickness and shine lost in so much of pollution.

4. Prevent Dandruff:


  1. You need the juice or pulp of 2 beetroots and half a cup of neem water.
  2. Mix it together and leave it in for half an hour.
  3. Rinse it off with Head & Shoulders Anti Dandruff Shampoo- Smooth & Silky and repeat once a week for some amazing results. It can’t get any simpler than this!

5. As A Natural Hair Colour:


  1. We promised to let you in on our secret recipe for naturally red hair colour. It’s time!
  2. You need at least a cup of beetroot juice, half a cup of black tea and half a cup of rose water.
  3. Mix it all and apply to your hair for an hour. 

The antioxidants in the tea will leave your hair with a healthy lustre, and the pigment found in beetroot which leaves stains all aver your kitchen slab will provide you with a red tinge which will last for around 2 weeks. The best thing about it is that you can repeat it as many times as you want without getting worried about any chemical damage to your beautiful tresses. 

7 Home Remidies To Cure Toothache

0

Even if you brush and floss twice a day, you are not impervious to pain in teeth. Try these home remedies to deal with your toothache.

Whether you have a cavity, a broken tooth, an abscess or sinusitis, toothache can cause excruciating pain and unbearable discomfort. But don’t worry, a toothache home remedy offers some much needed immediate relief.

7 Home Remedies To Fight Severe Toothache

#1 Spice is nice: A hint of spice not only rids you of the pain but also disinfects the area. Grind fresh ginger and cayenne pepper in equal parts with water to a fine paste. Now, soak a ball of cotton in the mixture till it saturates and place it on your tooth; take care to avoid your gums and tongue. The spices give heat but can also cause the area to burn, keep it in place till the pain fades away.

#2 Cloves to the rescue: A traditional toothache soothing method, put two drops of clove oil on a cotton ball and place it against the tooth until the pain recedes. Alternatively, chew a whole clove a little to release its oil and keep it in place on your tooth for up to half an hour. There is nothing quite like the anti-bacterial, anti-oxidant and anaesthetic clove to make the pain vanish like magic.

#3 Hot and cold fermentation: Like any other injury, alternative application of heat and cold can make the area numb to pain. Cover an ice pack with a face cloth or towel and hold it over your cheek where the problem is. After a few minutes, try the opposite and hold a hot compress to the affected area. This will subside the pain for a good amount of time.

#4 Tea for tooth trouble: Tannic acid is great to relieve pain and tea contains it aplenty. Put 1 teaspoon dried peppermint tea leaves in 1 cup boiling water and soak for 20 minutes. After the tea cools, swish it around in your mouth, then spit it out. Alternatively place a warm, wet tea bag against the affected tooth for temporary relief.

#5 Tea tree oil treatment: With its anti-inflammatory and antiseptic properties, tea tree oil helps alleviate tooth ache. Add a couple of drops to a cotton swab and hold in place or add a few drops of tea tree oil to a small glass of lukewarm to warm water and rinse your mouth with it.

#6 Gargle with salt water: Mix a tablespoon of salt in a small glass of warm water; swirl it around inside your mouth for as long as you can before spitting it out. Repeat as required.

#7 Use garlic mash: A medicinal compound Allicin present in garlic makes it a powerful antibacterial agent and anaesthetic which can help tackle a tooth infection and give instant pain relief. Peel and smash a couple of garlic cloves. Add some salt and place the mash on the affected area, settling it inside the cheek. Let it remain in place till the pain subsides.

While you must visit your dentist to rule out any underlying illness, simple and natural home remedies for toothache can provide relief till you make it to the clinic.

Read expert
tips for oral health and dental carehere.

Read more
health tips to stay fit.Avail exciting Oral B coupons here at Reward Me

How to help your child care for their teeth at each stage and age

0

Supporting our children in developing good habits is one of our most important roles as parents. Knowledge is power, so use this handy guide to each and every stage of your child’s .

There are many reasons for bleeding gums, but one to keep in mind is that gums can bleed due to a person’s use of blood thinners. An obvious way to cure bleeding gums would be to stop the medication, but blood thinners are necessary for many people, since they are designed to prevent blood clots. Some blood thinners are meant to be taken long-term, while others are prescribed for a few weeks only.

Be sure to tell your dentist that you are taking a blood thinner before you schedule a dental procedure. You may need to stop taking the medication for a few days prior to the procedure and undergo a blood test. But don’t stop taking medication without consulting your doctor. Communication is the key to successfully managing a dental procedure and maintaining good oral hygiene while taking blood thinners.

People who take blood thinners must be especially careful in all aspects of personal hygiene, including shaving, tooth brushing, and flossing. Use a toothbrush with very soft bristles, and a soft floss to reduce any discomfort associated with oral care and to reduce your risk for bleeding gums. Brush and floss gently; don’t apply too much pressure. Also, be sure to wear a mouth guard if you participate in a contact sport, because the blood thinners will make you more susceptible to bleeding in the event of a mouth injury.

Read these useful tips to
get healthy gums.Read experttips for oral health and dental carehere.